


How to Create a Data Table in Power Bi?

Data tables are one of the most powerful tools available to those working with Power BI. As a data visualization and analysis tool, Power BI gives you the ability to create and manipulate data tables to help you gain insight into your data quickly and easily. In this guide, we’ll show you how to create a data table in Power BI, along with some of the features and tricks that can help you get the most out of your data.
To create a data table in Power Bi:
- Open Power Bi Desktop.
- Select ‘Get Data’ and choose the data source you would like to use for your data table.
- Select the relevant tables.
- Click ‘Transform Data’ and edit the data table as needed.
- Click ‘Close & Apply’ to save the changes.
- Select ‘Report’ on the left-hand side of the window.
- Click ‘Table Visual’ to create a visual representation of your data table.
- Edit the table to add or remove columns, rows, and other features.
How to Create a Data Table in Power BI
Power BI is a powerful data visualization tool that enables organizations to create meaningful insights from their data. It allows users to create data tables, charts, and other visualizations to quickly analyze and interpret their data. This article will guide you through the steps to create a data table in Power BI.
Step 1: Connect to Your Data Source
The first step to create a data table in Power BI is to connect to your data source. Power BI supports a wide range of data sources, including SQL Server, Oracle, Excel, and many others. Depending on your data source, you may need to install a driver or connector to enable the connection. Once you’re connected to your data source, you can begin to explore the data and create visualizations.
Step 2: Load Data into Power BI
Once you’ve established a connection to your data source, you can load the data into Power BI. You can do this by clicking on the “Get Data” button in the ribbon and selecting your data source. You can then select which tables and columns you want to load into Power BI. You can also choose to load your data incrementally, which will allow you to keep your data up-to-date.
Step 3: Create a Data Table
Once you’ve loaded your data into Power BI, you can create a data table. To do this, select the “Data” tab in the ribbon, then select the “New Table” option. This will open a new window where you can select the columns you want to include in the table. You can also customize the data table by adding filters, sorting, and calculations.
Step 4: Visualize Your Data
Once you’ve created your data table, you can begin to explore and visualize your data. Power BI offers a variety of visualizations to help you gain insights from your data. You can create charts, maps, and graphs to better understand your data. You can also use Power BI’s powerful analytics tools to uncover hidden patterns and relationships in your data.
Step 5: Publish Your Visualization
Once you’ve created your visualization, you can publish it to the web, or share it with your team. You can publish your visualization to the web by clicking the “Publish” button in the ribbon. This will generate a link to your visualization, which you can then share with others. You can also embed your visualization in a website or blog post.
Step 6: Monitor Your Data
Once you’ve published your visualization, you can monitor your data in real-time. Power BI offers a variety of monitoring tools, including alerts and dashboards, which will help you stay on top of your data. You can also use these tools to detect anomalies and trends in your data.
Step 7: Analyze Your Data
Finally, you can use Power BI to analyze your data. Power BI offers a number of advanced analytics tools, such as predictive analytics and machine learning, which can help you uncover insights from your data. You can also use Power BI to create reports, which can be used to communicate your findings to your team and stakeholders.
Top 6 Frequently Asked Questions
Q1: What is a Data Table in Power BI?
A Data Table in Power BI is a graphical representation of data in tabular form. It is a powerful tool used to visualize data in an organized manner. Data Tables are used to display data in columns and rows. They can be used to facilitate data analysis and help to identify trends, outliers, and correlations. Data Tables can be used to compare different sets of data or to display metrics over time.
Q2: How do I Create a Data Table in Power BI?
Creating a Data Table in Power BI is a simple process. First, select the data you want to visualize in the Power BI Desktop. Then, click the “Table Visual” option from the Visualizations pane. A blank Data Table will appear in the report canvas. Once you’ve selected the fields you want to display, you can adjust the columns and rows of the Data Table and customize it to your needs.
Q3: What Types of Data Can I Include in a Data Table in Power BI?
Data Tables in Power BI can include any type of data, including numbers, text, dates, and images. You can also include calculations in a Data Table, such as sums and averages. Additionally, you can create relationships between different fields and use those to create visualizations.
Q4: How Do I Format and Configure a Data Table in Power BI?
You can easily format and configure a Data Table in Power BI by using the formatting pane. This pane allows you to adjust the font type, color, and size of text in the table. You can also adjust the background color of the table, as well as the width of the columns and rows. You can also configure the table by adding filters, sorting data, and grouping data.
Q5: What Are the Benefits of Using a Data Table in Power BI?
Data Tables in Power BI are a valuable tool for visualizing data. They allow you to quickly identify trends and outliers, compare different sets of data, and display metrics over time. Data Tables are also easy to configure and customize to fit your needs.
Q6: How Do I Share a Data Table in Power BI?
Once you’ve created a Data Table in Power BI, you can easily share it with others. To share a Data Table, click the “Share” button in the top right corner of the report canvas. You can then either share the report with individuals or share it publicly via the Power BI website. You can also export the Data Table to an image file to share it via email or social media.
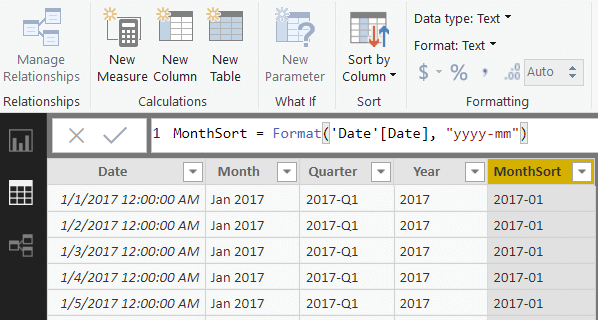
Creating a simple date table in Power BI
Creating a data table in Power BI is a great way to quickly and easily visualize your data. It allows you to quickly find patterns, analyze trends, and make decisions. With the help of a few clicks, you can create a powerful data table in Power BI that will help you understand your data and take your business to the next level. With the right data, you can make accurate and informed decisions that will help you and your business succeed.