


How to Create a Timeline on Powerpoint?

Creating a timeline on PowerPoint can be a great way to showcase a project’s progress or to illustrate a sequence of events. Whether you’re creating a timeline for a school project, work presentation, or personal use, this quick guide will walk you through the basics of creating a timeline on PowerPoint. Learn how to make an informative timeline that will keep your audience engaged and help you achieve your presentation goals!
Creating a timeline on Powerpoint is easy. Here are the steps you need to follow:
- Open Microsoft Powerpoint and select ‘Blank Presentation’
- Go to ‘Insert’ tab, then select ‘SmartArt’
- Under the ‘Hierarchy’ section, select ‘Timeline’
- A timeline will appear on the page. Now, click on the timeline to start editing
- Add your desired text and make the necessary changes
- Finally, click on ‘Save’ to save the timeline
Creating a Timeline Using Microsoft Powerpoint
PowerPoint is a powerful presentation tool from Microsoft, used by professionals in all sorts of industries. It is also a great tool for creating timelines. Creating a timeline in PowerPoint can be done in just a few easy steps.
The first step is to open up a blank PowerPoint document. From there, you can add a timeline template to the slide. There are a variety of timeline templates available, or you can create your own. Once the template is added to the slide, you can begin adding the timeline elements.
Adding Timeline Elements
The timeline elements you add will depend on the type of timeline you are creating. For example, if you are creating a timeline of events, you will need to add dates and events. If you are creating a timeline of milestones, you will need to add milestones and dates.
Once you have added the timeline elements, you can begin to customize the timeline. This includes adding text, images, and colors. You can also add animations and transitions to enhance the timeline.
Organizing Timeline Elements
Once you have added the timeline elements, you can begin to organize them. This includes adding labels, connecting the elements, and adding arrows to show the flow of the timeline. You can also adjust the spacing between the timeline elements to make the timeline more visually appealing.
Formatting the Timeline
The final step is to format the timeline. This includes adding a background image, changing the font size and color, and adjusting the size and position of the timeline elements. Once you are satisfied with the timeline, you can save the PowerPoint document and share it with others.
Creating a Professional Timeline
Creating a professional timeline in PowerPoint is a great way to showcase your data and information in an attractive and organized way. The steps outlined above should help you create a timeline that will impress your colleagues and clients.
Using Templates
One of the easiest ways to create a professional timeline is to use a template. There are a variety of timeline templates available online that you can use to create your timeline. These templates are easy to use and can be customized to fit your specific needs.
Exporting the Timeline
Once you have created your timeline, you can export it as a PDF or an image file. This will allow you to easily share the timeline with others or post it online. You can also print the timeline if you need a hard copy.
Conclusion
Creating a timeline in PowerPoint is a great way to showcase your data and information in an attractive and organized way. With the help of templates, you can create a professional timeline in just a few easy steps. After the timeline is created, you can export it as a PDF or an image file and share it with others.
Related FAQ
What is a Timeline?
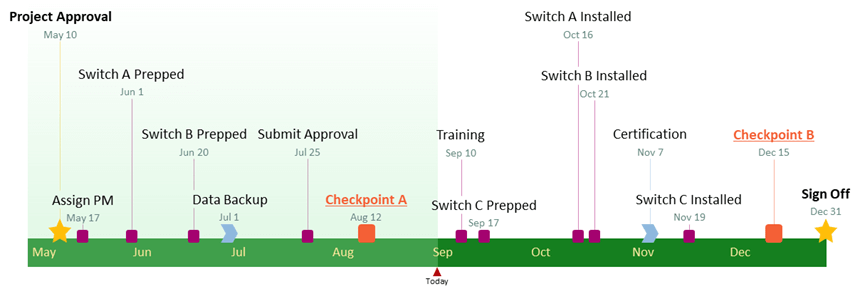
A timeline is a graphical representation of a chronological sequence of events. It can be used to show the progress of a project or the development of an idea over time, to illustrate the cause and effect of events, or to show the relationship between different elements. Timelines can be created using a variety of tools, such as Microsoft PowerPoint.
What is Needed to Create a Timeline on PowerPoint?
Creating a timeline in PowerPoint requires the following tools: a computer with Microsoft PowerPoint installed, a timeline template or a blank PowerPoint file, and information about the events to be included in the timeline.
How to Create a Timeline on PowerPoint?
Creating a timeline in PowerPoint is a simple process. First, select a timeline template or open a blank PowerPoint file. Then, enter the events to be included in the timeline, along with the dates. After that, add images, shapes, and other elements to the timeline to make it visually appealing. Finally, save the timeline as a PowerPoint file and share it with others.
What Types of Timelines Can Be Created in PowerPoint?
There are many types of timelines that can be created in PowerPoint, depending on the purpose of the timeline. These include project timelines, event timelines, historical timelines, family timelines, and more.
What Are the Benefits of Creating a Timeline in PowerPoint?
Creating a timeline in PowerPoint has several advantages over other methods. It is easy to use, cost-effective, and allows for the creation of visually appealing timelines that can be shared with others. Additionally, PowerPoint timelines are easy to edit and update, making them a great choice for tracking progress over time.
Are There Any Tips for Creating a Timeline in PowerPoint?
Yes, there are several tips for creating a timeline in PowerPoint. To make the timeline visually appealing, use a combination of images, shapes, and text. Additionally, use consistent formatting for dates and events to make the timeline easier to read. Finally, use a timeline template to save time and ensure accuracy.
How to make a timeline in powerpoint
Creating timelines in Powerpoint has become an increasingly popular way to organize and display information. By following the simple steps outlined here, you can quickly and easily create a timeline that is visually appealing and effective in communicating key information. With the right approach, you can create a timeline that will be both informative and engaging. So, why not give it a try today and see the results for yourself?