


How to Create a Workbook in Excel?

If you’re looking to create a workbook in Excel, then you’ve come to the right place! In this guide, we will walk you through the steps of creating a workbook in Excel, from creating a new spreadsheet to organizing your data and making sense of it. Whether you’re a novice or an experienced Excel user, this guide will provide you with the information and resources you need to create a workbook that works for you and your business. So let’s get started and learn how to create a workbook in Excel!
Creating a workbook in Excel is simple. Follow these steps:
- Open Microsoft Excel. If you don’t have it, you can download it here.
- Once opened, click on the “File” tab. A menu will appear.
- Select “New” from the menu.
- Choose the type of workbook you wish to create.
- A new workbook will appear. You can now start building it.
Creating A Workbook In Excel
Excel is one of the most powerful and versatile spreadsheet programs available. It allows users to create, store, and manipulate data in a variety of ways. Workbooks are the files created in Excel which contain multiple worksheets. With the right know-how, creating a workbook in Excel is a simple process.
Steps To Create A Workbook
Creating a workbook in Excel is straightforward and simple. A few steps are all that are needed to get started.
Step 1: Open Microsoft Excel
The first step is to open Microsoft Excel. This can be done by clicking the start menu and choosing Excel from the list of programs. Alternatively, the shortcut key for opening Excel is “Ctrl + E”.
Step 2: Create A New Blank Worksheet
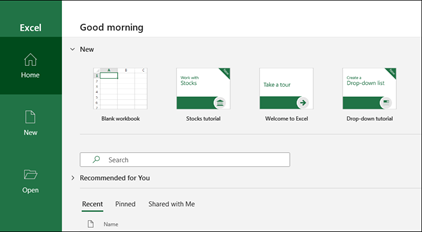
The next step is to create a new blank worksheet. This is done by clicking on the “New” button in the top left-hand corner of the window. This will open up a list of templates to choose from. Select the “Blank Workbook” option to create a new, blank worksheet.
Organizing Your Workbook
After creating the blank workbook, the next step is to organize it. This can be done by adding page tabs to the workbook. To do this, click on the “Insert” tab and then select the “Page Tabs” option. This will create a new page tab in the workbook. You can then enter the name of the tab in the box provided.
Adding Data To Your Worksheet
Once the workbook is organized, you can begin to add data to the worksheet. To do this, click on the “Data” tab and then select the “Add Data” option. This will open up a new window where you can enter the data you want to add. You can also use formulas to calculate data in the workbook.
Saving The Workbook
When you are finished adding data to the workbook, the final step is to save it. To do this, click on the “Save” button in the top left-hand corner of the window. This will open up a new window where you can enter the name for the workbook and select the folder where you want to save it. Once you have entered the name and selected the folder, click “Save” to finish creating your workbook.
Making Changes To Your Workbook
Once you have created your workbook, you may want to make changes to it. This can be done by clicking on the “Edit” tab and then selecting the “Edit Workbook” option. This will open up a new window where you can make changes to your workbook.
Adding Worksheets
To add a worksheet to your workbook, click on the “Insert” tab and then select the “Worksheet” option. This will open up a new window where you can enter the name of the worksheet and select the type of worksheet you want to add.
Deleting Worksheets
If you want to delete a worksheet from your workbook, you can do so by clicking on the “Delete” tab and then selecting the “Delete Worksheet” option. This will open up a new window where you can select the worksheet you want to delete.
Sorting Data
You can also sort data in your workbook by clicking on the “Data” tab and then selecting the “Sort” option. This will open up a new window where you can select the data you want to sort and the sorting order.
Printing Your Workbook
Once you have made all the changes to your workbook, you can print it out. To do this, click on the “File” tab and then select the “Print” option. This will open up a new window where you can select the printer, paper size, and other printing options.
Previewing Your Workbook
Before printing your workbook, you can preview it by clicking on the “View” tab and then selecting the “Print Preview” option. This will open up a new window where you can preview the workbook and make any necessary changes before printing.
Printing Your Workbook
Once you are satisfied with the preview of your workbook, you can print it by clicking on the “Print” button. This will open up a new window where you can select the printer, paper size, and other printing options. When you are finished, click “Print” to print your workbook.
Conclusion
Creating a workbook in Excel is a straightforward process. With the right know-how, it can be done in just a few simple steps. Once you have created your workbook, you can make changes to it, sort data, and print it out. By following these steps, you can easily create a workbook in Excel.
Few Frequently Asked Questions
What is an Excel Workbook?
An Excel Workbook is a collection of individual spreadsheets, which are known as worksheets. A workbook allows users to store, organize and analyze data. The workbook is the main file that must be saved in order to save any changes made to the worksheets.
How do I Create a Workbook in Excel?
Creating a workbook in Excel is easy. Start by opening the Excel application, then click the “File” tab. Under the “New” section, click the “Blank Workbook” option. A new workbook will appear, with separate worksheets labeled Sheet1, Sheet2, and so on. You can add more worksheets as needed.
Can I Customize a Workbook?
Yes, you can customize a workbook by adding a new worksheet, changing the name of a worksheet, or rearranging the order of worksheets. You can also add graphs, tables, and other types of data to each worksheet.
What’s the File Extension for a Workbook?
The file extension for a workbook is .xlsx, which stands for Excel Spreadsheet.
What are Some of the Features of a Workbook?
A workbook contains several features that allow users to organize and analyze data. They include the ability to use formulas, format text, insert images, and create charts. Other features include the ability to filter data, create pivot tables, and use macros to automate repetitive tasks.
How do I Save a Workbook?
Once you are done creating or editing a workbook, you can save it by clicking the “File” tab and selecting the “Save As” option. Choose a location and enter a name for your workbook, then click “Save”. You can also save the workbook as a PDF or other file type.
Excel: Creating and Opening Workbooks
Creating a workbook in Excel is a great way to organize data, analyze results, and present information in an easy-to-understand format. With a few simple steps, you can create a workbook that’s both visually appealing and functionally powerful. By following the guidelines outlined in this article, you’ll be able to create a workbook that meets your specific needs and makes Excel data easier to understand. With the right workbook in place, you can be sure that your data is properly organized and presented in a way that will help you make the best decisions for your business.