


How to Export Ms Project to Excel?

If you are looking for an efficient way to export your Microsoft Project data to Excel, you have come to the right place. In this article, we will explore the various options available for exporting MS Project to Excel, as well as their respective advantages and disadvantages. We will also look at how to use the Microsoft Project application to quickly and easily export your data to Excel. With this information, you will be able to choose the best method for your needs and make the most of your data exports.
How to Export MS Project Data to Excel
Microsoft Project is a versatile project management software used to manage a variety of tasks and resources. However, in order to share and present this data more easily, you may want to export it to an Excel spreadsheet. Fortunately, MS Project makes it easy to export your data to Excel.
Step 1: Prepare Your Project File
Before you can export your MS Project file to Excel, you will need to make sure the project is properly formatted. This means ensuring that the columns you want to export are visible in the project and that all the data is up to date. You should also make sure that the view you are using for the export is filtered correctly, if necessary.
Check the Columns
First, check the columns you want to export to make sure they are visible. To do this, click the “View” tab, then click the “Table” drop-down menu and select the table that contains the columns you want to export.
Check the Data
Once the columns are visible, you should check the data to make sure it is up to date. To do this, click the “Project” tab, then click the “Refresh” button. This will update the project’s data to the current version.
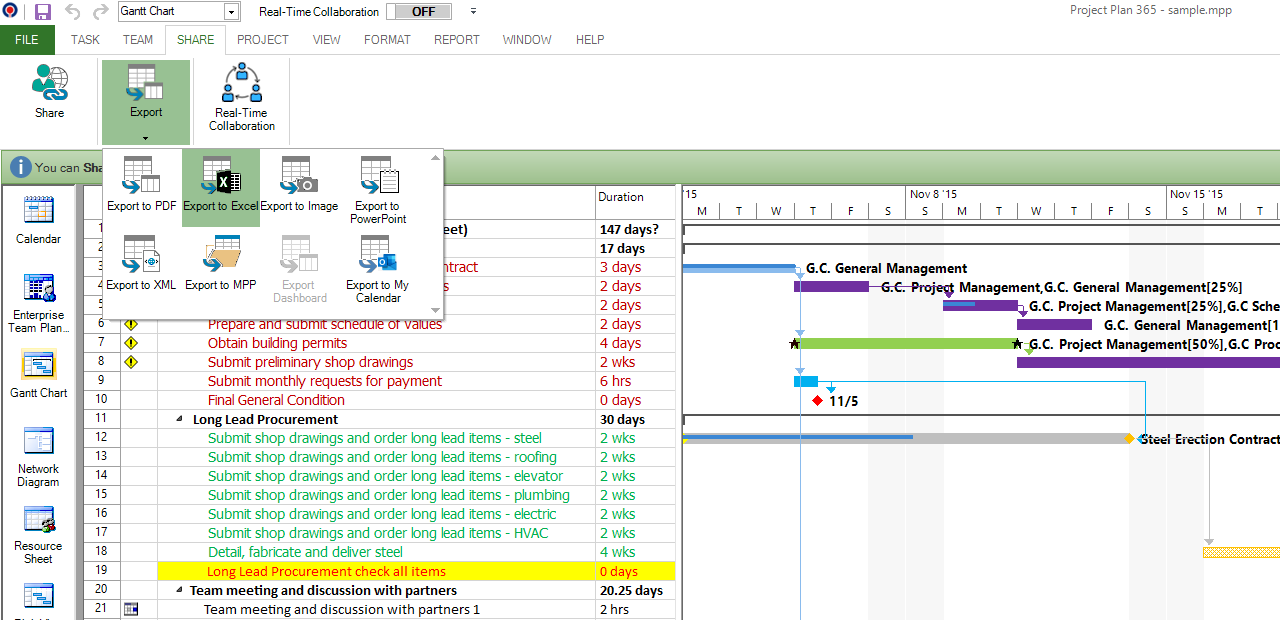
Step 2: Export to Excel
Once you have prepared your project file, you can export it to Excel. To do this, open the project file and click the “File” tab. Then, click the “Save As” option and select the “Excel Workbook” option from the file type drop-down menu.
Choose a File Name
Once you have selected the Excel Workbook option, you will be prompted to enter a file name for the Excel file. Enter a file name and click the “Save” button to save the Excel file to your computer.
Check the Data
Once the file has been saved, open it in Excel to check the data. Make sure the columns you wanted to export are visible and that the data is accurate. Once you have checked the data, you can save the file and share it with others.
Step 3: Share Your Data
Once you have exported your MS Project data to Excel, you can share the file with others. To do this, open the Excel file and click the “File” tab. Then, click the “Share” button and select the “Share” option from the drop-down menu. This will open a window where you can enter the email address of the person you want to share the file with.
Enter Email Address
Enter the email address of the person you want to share the file with and click the “Share” button. This will send them an invitation to view the file.
Track Changes
If you want to track changes to the file, you can click the “Track Changes” button. This will enable you to view any changes that have been made to the file by other users.
Step 4: Update the Excel File
Once you have shared the Excel file, you can update it with the latest version of the MS Project file. To do this, open the MS Project file and click the “File” tab. Then, click the “Save As” option and select the Excel Workbook option from the file type drop-down menu.
Choose a File Name
Once you have selected the Excel Workbook option, you will be prompted to enter a file name for the Excel file. Enter a file name and click the “Save” button to save the Excel file to your computer.
Update the File
Once the file has been saved, open it in Excel and click the “File” tab. Then, click the “Update” button to update the file with the latest version of the MS Project file. This will update the Excel file with the latest version of the project data.
Frequently Asked Questions
Exporting your MS Project to Excel can be a great way to take your project management to the next level. With the help of this tutorial, you are now equipped with the knowledge and know-how to efficiently and effectively export your MS Project data to Excel. The data can be used to create more powerful pivot tables and reports, enabling you to make better decisions for your projects. It is a quick and easy process that can help you manage your projects more efficiently. With the knowledge you now have, you are one step closer to becoming a successful project manager.