


How to Install Mysql in Windows 10

MySQL is a powerful database management system used by many web applications to store and organize their data. Installing MySQL on Windows 10 can be a great way to get started learning about databases and how to use them in your own applications. In this article, we’ll show you how to install MySQL on your Windows 10 machine, step by step. We’ll also cover some of the basic concepts of database management and provide some tips and tricks to get you up and running quickly. So if you’re ready to learn how to install MySQL in Windows 10, let’s get started!
1. Download the MySQL installer from the MySQL website and run it.
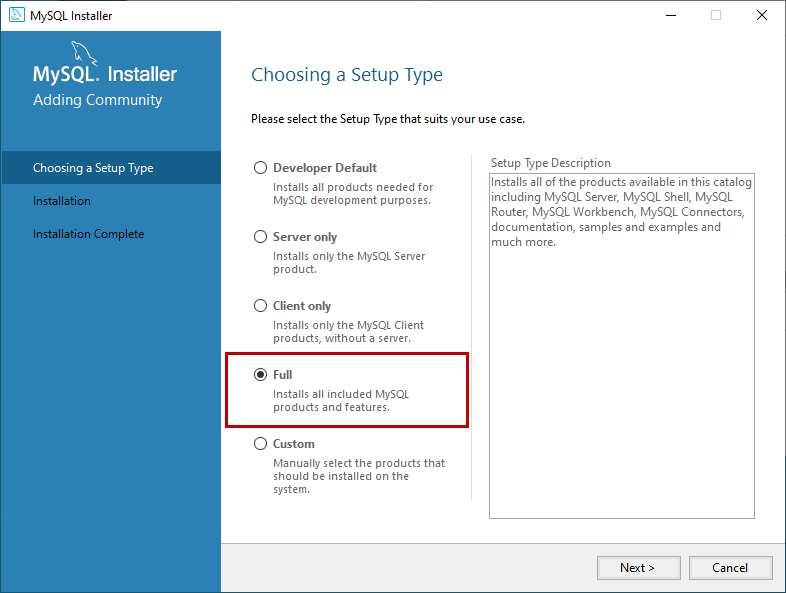
2. Choose the “Full” installation type and click “Next”.
3. Select the “MySQL Server” feature and click “Next”.
4. Choose the default setup type and click “Next”.
5. Select a password for the root user and click “Next”.
6. Select the “Configure MySQL Server now” option and click “Finish”.
7. Select the “Detailed Configuration” option and click “Next”.
8. Select the “Developer Machine” option and click “Next”.
9. Select the “Multifunctional Database” option and click “Next”.
10. Select the “Enable TCP/IP Networking” and “Enable Strict Mode” options, and click “Next”.
11. Select the “Install As Windows Service” option and click “Next”.
12. Click “Execute” to apply the changes, and then click “Finish”.
Downloading MySQL for Windows 10
Before you can begin the installation process for MySQL in Windows 10, you must first download the MySQL installer package. To do this, you will need to visit the MySQL website and download the latest version of MySQL for Windows 10. Once the installer package has been downloaded, you can begin the installation process.
The next step is to run the installer package to begin the installation. To do this, you will need to double-click on the installer package and follow the on-screen instructions. During the installation process, you will be asked to specify the installation directory, as well as other configuration options. It is important to make sure that you select the correct options during the installation process to ensure that MySQL is installed correctly.
Once the installation is complete, you should double-check the installation directory to ensure that everything was installed correctly. Once the installation is verified, you can begin the process of configuring MySQL for use in Windows 10.
Configuring MySQL for Windows 10
Now that MySQL is installed, you can begin the process of configuring it for use in Windows 10. To do this, you will need to open the MySQL Command Line Client. This will allow you to connect to the MySQL server and configure the settings that you want.
The first step is to create a new user account. This will allow you to access the MySQL server with a secure username and password. Once a new user account has been created, you can then set the privileges that the user has. This will determine what types of operations the user is allowed to perform on the MySQL server.
The second step is to configure the database. This will allow you to create and manage the databases that you want to use in Windows 10. Once the databases have been created, you can then set the permissions for each database. This will determine what types of operations can be performed on each database.
Connecting to MySQL from Windows 10
Once MySQL has been installed and configured, you can now begin the process of connecting to it from Windows 10. To do this, you will need to open the MySQL Command Line Client and connect to the MySQL server. Once you have connected, you can then begin to execute queries and perform other operations on the MySQL server.
Using the MySQL Command Line Client
Once you have connected to the MySQL server, you can then begin to use the MySQL Command Line Client to execute queries and perform other operations. The MySQL Command Line Client is a powerful tool that allows you to easily execute queries and perform other operations on the MySQL server.
Using the MySQL Workbench
Another way to connect to the MySQL server is to use the MySQL Workbench. The MySQL Workbench is a powerful graphical user interface (GUI) tool that allows you to easily execute queries and perform other operations on the MySQL server.
Testing the MySQL Connection
Once you have connected to the MySQL server and configured it for use in Windows 10, you should then test the connection to ensure that everything is working properly. To do this, you can use the MySQL Command Line Client to execute a few simple queries. If the queries execute successfully, then the connection is working properly and you can begin using MySQL in Windows 10.
Using the MySQL Command Line Client to Test the Connection
The MySQL Command Line Client can be used to easily test the connection to the MySQL server. To do this, you will need to open the MySQL Command Line Client and connect to the MySQL server. Once you are connected, you can then execute a few simple queries to verify that the connection is working properly.
Using the MySQL Workbench to Test the Connection
The MySQL Workbench can also be used to easily test the connection to the MySQL server. To do this, you will need to open the MySQL Workbench and connect to the MySQL server. Once you are connected, you can then execute a few simple queries to verify that the connection is working properly.
Top 6 Frequently Asked Questions
What is MySQL?
MySQL is an open-source relational database management system (RDBMS). It is one of the most popular and widely used database systems in the world. It is used to store, organize, and retrieve data from a database. MySQL is used in many web applications such as WordPress, Drupal, Joomla, and many others. It is also used in many large-scale applications such as Facebook, Twitter, Google, and Amazon.
What are the requirements to install MySQL in Windows 10?
To install MySQL in Windows 10, you will need a Windows 10 machine and the latest version of MySQL Server. The installation of MySQL on Windows 10 requires an Internet connection, a valid MySQL account, and an Administrator account with full access to the machine. You will also need to install the appropriate drivers for your version of MySQL.
How do I install MySQL in Windows 10?
To install MySQL in Windows 10, you will first need to download the MySQL installer from the Oracle website. After downloading the installer, double-click on the .msi file to launch the installation wizard. Follow the instructions in the wizard to install MySQL on your machine.
What are the steps to configure MySQL in Windows 10?
Once MySQL is installed, you will need to configure it. This involves setting up a root user and password, creating databases, and configuring the server settings. To configure MySQL, you will need to open the MySQL command-line interface (CLI) and enter the appropriate commands.
How do I secure MySQL in Windows 10?
Securing MySQL in Windows 10 is essential for protecting your data. To secure MySQL, you should use strong passwords, limit access to the database, and set up logging and auditing. You should also use a secure connection between your server and client, and use SSL encryption to protect the data.
How do I troubleshoot MySQL in Windows 10?
If you experience any problems with MySQL in Windows 10, you should first check the configuration settings. If the settings are correct but the problem persists, you should check the MySQL log files to see if there are any errors. If the log files do not reveal the source of the problem, you should contact a qualified technician for assistance.
How To Install MySQL on Windows 10
If you have been looking for a guide to help you install MySQL in Windows 10, then this article has provided you with all the necessary steps. With this guide, you can now confidently install MySQL on your Windows 10 machine and start exploring your data with the power of this popular database. So, go ahead and get started with your database exploration journey today!