


How to Install New Fonts Windows 10?

Installing new fonts can be one of the most exciting parts of using a computer. Windows 10 gives you the ability to customize your computer with a huge range of fonts that can be used to create stunning documents, artwork and more. In this guide, we will explain how to install new fonts on Windows 10 and show you the best practices to make sure your new fonts work correctly. So, if you’re ready to spice up your computer with some new fonts, let’s get started!
Installing Fonts in Windows 10:
1. Open the Start menu and select Settings.
2. Click on Personalization.
3. Select Fonts from the left menu.
4. Select Get more fonts in Microsoft Store.
5. Browse the available fonts and select one you like.
6. Click Get and then follow the on-screen instructions to install it.
7. Once installed, the font should appear in the font list in any program that uses the Windows font library.
Introduction to Installing New Fonts in Windows 10
Installing fonts on Windows 10 is a very straightforward process. With Windows 10, you can easily download and install new fonts from the internet. It is also possible to install a font from a file stored on your computer or from a CD or DVD. In this article, we will discuss how to install a new font on Windows 10.
Downloading Fonts from the Internet
The first step to installing a new font on Windows 10 is to download the font from the internet. There are several websites that offer a wide variety of fonts for free or for a small fee. Once you have selected the font you would like to install, simply download it to your computer.
Using the Fonts Control Panel
Once you have downloaded the font, you can then add it to your computer by using the Fonts Control Panel. To access the control panel, open the Start menu, type in “Fonts” and select the first item in the list. This will open the Fonts Control Panel, which will allow you to view the currently installed fonts, add new fonts and delete existing fonts.
Installing the Font
Once you are in the Fonts Control Panel, you can then install the new font by clicking the Install button. This will prompt a window to pop up, which will allow you to select the font you have downloaded. Once you have selected the font, it will be installed on your computer and ready to use.
Using a File to Install the Font
If you have a font stored on your computer, such as a file from a CD or DVD, you can also install it by using the Fonts Control Panel. To do this, simply open the Fonts Control Panel, click the Install button and then select the file you want to install.
Using the File Explorer
Another option for installing a font from a file is to use the File Explorer. To do this, open the File Explorer and navigate to the location where the font file is stored. Once you have located the file, simply double-click on it and the font will be installed on your computer.
Using Third-Party Software
If you are having difficulty installing a font from a file, you may want to consider using third-party software. There are many third-party programs available that can help you install fonts on Windows 10. These programs are usually very easy to use and can usually be downloaded for free.
Uninstalling Fonts
If you no longer need a font, you can uninstall it by using the Fonts Control Panel. To do this, open the Fonts Control Panel and select the font you want to uninstall. Once you have selected the font, click the Uninstall button and the font will be removed from your computer.
Conclusion
Installing fonts on Windows 10 is a very simple process. With the help of the Fonts Control Panel, you can easily add, remove and manage all of your fonts. You can also use third-party software if you are having difficulty installing a font. Once you have installed a font, it will be ready to use on your computer.
Top 6 Frequently Asked Questions
1. What is a font?
A font is a set of text characters that have a particular design and size. Fonts can be used to create logos, titles, and other graphics. They are typically installed onto a computer’s operating system, such as Windows 10, allowing you to use the font in a variety of applications.
2. What is the difference between a font and a typeface?
A font is a single style of a typeface, such as bold or italic. A typeface is a family of related fonts, such as Helvetica, Times New Roman, or Arial. Typefaces can have multiple fonts in different weights, styles, and sizes.
3. How do I install new fonts on Windows 10?
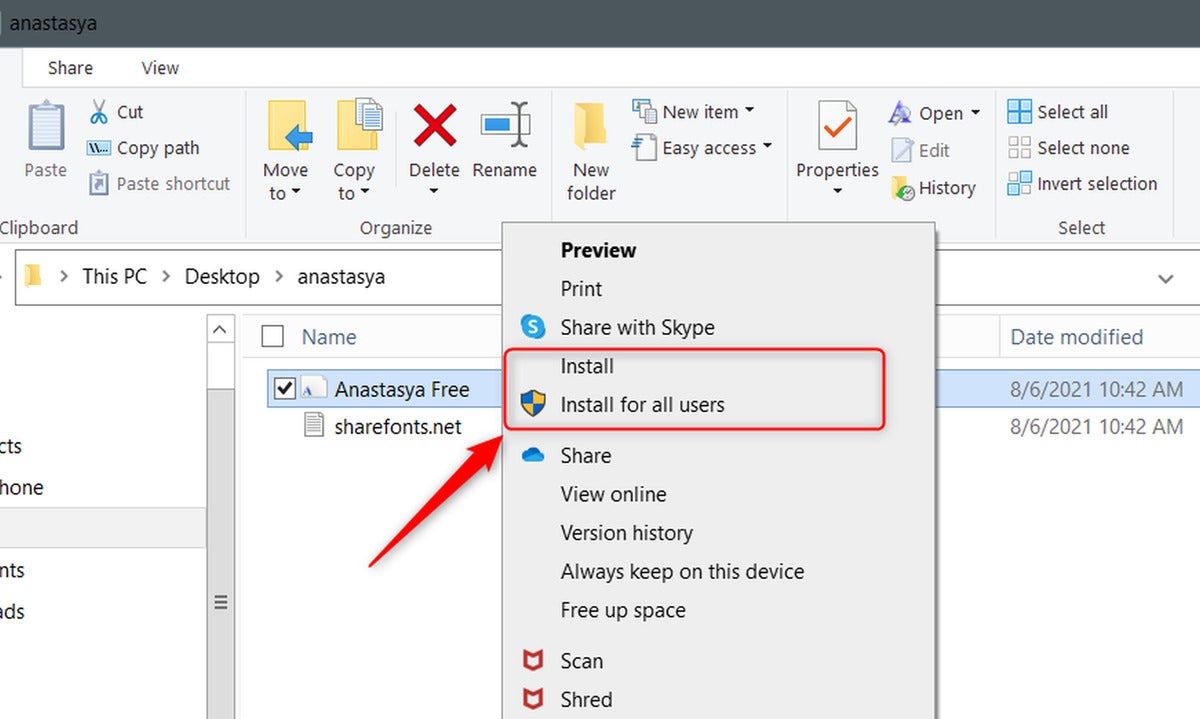
To install new fonts on Windows 10, you can either download the font files from the internet or purchase them from a font store. Once you have the font files downloaded, you can open the Fonts folder in Windows and drag and drop the font files into the folder. Alternatively, you can right-click the font file and click Install.
4. What types of font formats can I install on Windows 10?
Windows 10 supports OpenType (.otf) and TrueType (.ttf) font formats. Other font formats, such as PostScript (.ps) and Tagged Image File Format (.tif) can be converted to either of these formats in order to be installed.
5. Does Windows 10 support custom fonts?
Yes, Windows 10 supports custom fonts. You can install custom fonts from the internet or from a font store. You can also create your own custom fonts using a font editor.
6. What happens if I install too many fonts on Windows 10?
Installing too many fonts on Windows 10 can slow down your computer. The more fonts installed, the more resources the operating system needs to manage them. Additionally, having too many fonts can make it difficult to find the font you are looking for. It is recommended to only install the fonts you need and remove any fonts you do not use.
✔️ Windows 10 – How to Install Fonts – Add Fonts to Windows 10
Installing new fonts in Windows 10 can be a fun and easy way to customize your computer. With just a few clicks, you can add a personal touch to your documents and emails. While the process is simple, it’s important to keep in mind that the fonts you choose may not be compatible with all programs or other operating systems. By taking the time to install these fonts correctly, you can create a unique look for your computer that can be used for both work and play.