


How to Record Webinar on Windows 10?

Are you looking for an easy way to record webinars on your Windows 10 computer? With the right knowledge and the right tools, you can quickly and easily record webinars on your Windows 10 computer with great results. In this article, we’ll show you how to record webinars on Windows 10 and provide tips and advice on how to get the most out of your recordings. So, if you’re ready to start recording webinars on your Windows 10 computer, let’s get started!
Recording a webinar on Windows 10 is easy. Just follow these simple steps:
- Open the program you want to record, or launch your webinar.
- Press the Windows + G keys on your keyboard.
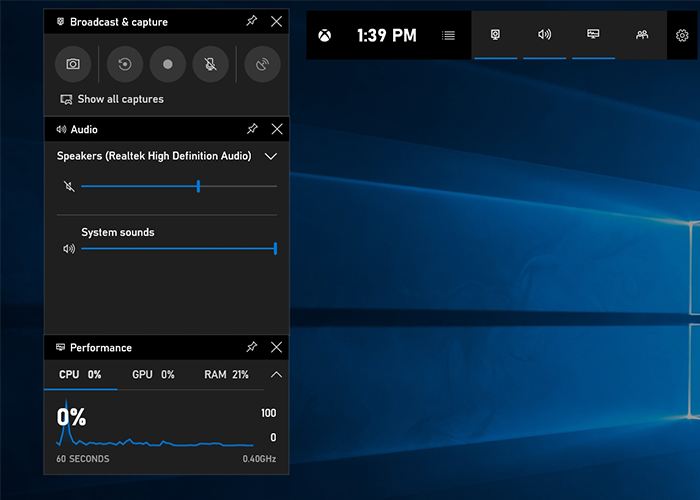
- The Game bar will appear. Click the Record button.
- The recording timer will start. When you’re finished, click the Stop button.
- The recording will be saved in the Videos folder on your computer.
How Can I Record a Webinar on Windows 10?
Many people use Windows 10 to host and view webinars. Recording these webinars is an important and useful way to capture important information and save it for future use. Fortunately, Windows 10 makes it easy to record webinars with a few simple steps.
Using Windows 10’s Built-In Tool
The simplest way to record a webinar on Windows 10 is to use the built-in tool. To do this, first open the Webinar app. Once the app is open, select the ‘Record’ option from the menu. You will then be asked to enter a name for the recording. Once you have entered a name, you will be able to begin recording. When the webinar is finished, the recording will be saved to your computer.
Another option is to use the Task Manager. To do this, open the Task Manager and select the ‘Record’ option. Once the recording is started, the Task Manager will begin recording the webinar. Once the webinar is finished, the recording will be saved to your computer.
Using Third-Party Software
There are also several third-party software programs available that can be used to record webinars. These programs typically have more features and options than the built-in Windows 10 tools. Some of the more popular programs include Camtasia, ScreenFlow, and OBS Studio.
Using a Webinar Recording Service
Another option is to use a webinar recording service. These services provide a simple way to record webinars with just a few clicks. The recordings are then stored on the service’s servers. Some of the more popular services include Zoom, WebEx, and GoToWebinar.
Using a Screen Recorder
Finally, you can also use a screen recorder to record a webinar. These programs allow you to record the entire screen, or just a portion of it. Popular screen recorders include Snagit, Screencast-O-Matic, and CamStudio.
Using an Audio Recording Device
If you don’t want to record the webinar video, you can also use an audio recording device. These devices are typically small and easy to use. Popular audio recorders include Zoom, Tascam, and Sony.
Tips for Recording Webinars on Windows 10
Test the Recording Beforehand
It is important to test the recording before the webinar. This will ensure that the recording is working properly and that there are no technical issues.
Choose the Right Audio Source
If you are using an audio recording device, it is important to choose the right audio source. If the audio source is too low, the recording will be of poor quality.
Position the Microphone Properly
If you are using a microphone, it is important to position it in the right spot. This will ensure that the audio is clear and of good quality.
Use a Backup Recording Device
It is always a good idea to have a backup recording device in case the primary one fails. This will ensure that you don’t miss out on any important information.
Save the Recording Immediately
Once the webinar is finished, it is important to save the recording immediately. This will ensure that you don’t lose the recording due to a technical issue.
Few Frequently Asked Questions
What is a Webinar?
A webinar is an online seminar or presentation which is broadcast over the internet that allows remote viewers to participate in a virtual meeting. It’s a great way for businesses to hold remote meetings, host lectures, and offer training sessions for their employees.
What is Required to Record a Webinar on Windows 10?
In order to record a webinar on Windows 10, you will need a computer with Windows 10, an internet connection, a webinar platform, recording software, and a microphone. You will also need to make sure that the recording software is compatible with your version of Windows 10.
How Do I Set Up My Computer to Record a Webinar?
The first step is to make sure that you have all the necessary components. Once you have everything you need, open the recording software and follow the instructions provided to set up the recording. Be sure to check the settings to make sure the recording is set up correctly.
How Do I Join a Webinar?
Joining a webinar is quite simple. All you need to do is find the webinar link or ID and enter it into the webinar platform. Once you’ve done that, you’ll be connected to the webinar and will be able to participate.
How Do I Record a Webinar?
Once you’ve joined the webinar, you’ll need to open the recording software and start the recording. Make sure to check the settings to ensure that the recording is of the highest quality. Once you’re finished recording, you’ll be able to save the file for later use.
How Do I Share a Recorded Webinar?
Once you’ve recorded the webinar, you can share it with others by uploading it to a cloud storage service or sending it as an email attachment. You can also upload it to a video sharing platform such as YouTube or Vimeo, so that it can be viewed by anyone with the link.
Best Way to Easily Record a Webinar (Step-by-Step)
Recording webinars on Windows 10 is a great way to capture important information and store it for future reference. Not only can you save the recordings for yourself, but you can also share the recordings with others. By following the step-by-step instructions, you can easily record webinars on Windows 10 and ensure that you have the information needed to move forward with success.