


How To Use Snipping Tool Windows 10

Capturing screenshots and editing them is a must for any modern computer user, and the Snipping Tool in Windows 10 is a great way to do just that. In this guide, we’ll show you how to use the Snipping Tool Windows 10 and unlock its full potential for taking great screenshots.
- Open the Snipping Tool – Click the Start button, type snipping tool, and press Enter.
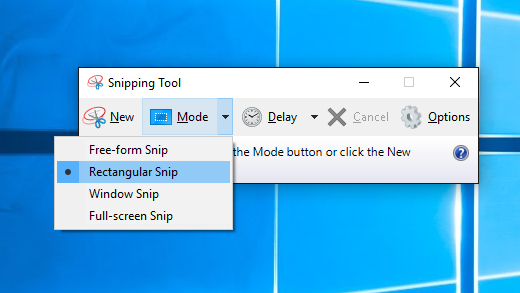
- Choose your snip type – Click the arrow next to the New button to choose between Free-form, Rectangular, Window, or Full-screen snip.
- Create your snip – Drag the cursor around an object to form a rectangle, or hold down the left mouse button and draw the area you want to capture.
- Save your snip – Click the Save Snip button to save the snip as an image file (PNG, GIF, and JPEG formats are supported).
- Annotate your snip – Click the Pen button to add annotations and drawings to your snip.
- Send your snip – Click the Send Snip button to share your snip via email or social media.
How Do I Use Ctrl Snipping Tool?
The Snipping Tool is a Windows program that provides a convenient way to take a screenshot of a portion of the screen. It is available in all versions of Windows since Windows Vista. To use the Snipping Tool, press the Windows key and the letter S simultaneously, then type “Snipping Tool.” You can also access the program through the Start menu.
Once opened, you can select the type of screenshot you want to take. There are four options available: Free-Form Snip, Rectangular Snip, Window Snip, and Full-Screen Snip. The Free-Form Snip allows you to draw any shape around the area you want to capture. The Rectangular Snip lets you draw a rectangle around the area you want to capture. The Window Snip captures the current open window, while the Full-Screen Snip captures the entire screen.
After selecting the type of screenshot you want to take, press the “New” button to start the snipping process. Your cursor will change to a crosshair, and you can now use it to select the area you want to capture. Once you have selected the area, it will be captured and displayed in the Snipping Tool window. From here, you can save it, copy it, or annotate it before saving it. You can also email the screenshot directly from the Snipping Tool.
How Does The Snipping Tool Work?
The Snipping Tool is a Microsoft Windows utility that allows users to capture screenshots and save them as an image file. It is useful for capturing parts of an image or a full window, which can then be used for presentations, documents, or other projects. The tool has several different modes that allow users to capture various types of screenshots, such as free-form, rectangular, window, and full-screen.
The Snipping Tool is easy to use and can be accessed from the Start Menu. Once launched, the user is presented with four options for capturing the screenshot. The Free-form Snip allows users to draw an outline around the desired area, while the Rectangular Snip does the same but with a rectangular shape. The Window Snip captures a window or menu, while the Full-screen Snip captures the entire screen. After selecting the desired capture mode, the user simply clicks and drags the mouse to capture the desired area.
Once the image is captured, the user can save the image in a variety of formats, such as JPEG, PNG, GIF, and BMP. The user can also annotate the screenshot by adding text, arrows, or shapes. The Snipping Tool also includes a delay feature that allows users to capture screenshots of menus that take time to open. This feature is especially useful for capturing screenshots of pop-up menus. With the Snipping Tool, capturing screenshots has never been easier.
How Do You Copy And Paste With The Snipping Tool?
The Snipping Tool is a great way to quickly copy and paste images or sections of your screen. It’s a simple and efficient way to capture images without having to use additional software. Here’s how to use the Snipping Tool to copy and paste onto your computer:
- Open the Snipping Tool. It can be found in the Accessories folder in your Start menu.
- Once the Snipping Tool is open, click on the drop-down menu next to “New”. This will allow you to select the type of snip you would like to take. You can choose from free-form, rectangular, window, or full-screen.
- Once you have selected the type of snip, click and drag the cursor over the area you would like to copy. This will create a screenshot of your selected area.
- You can then make any edits to the image before saving it. The Snipping Tool allows you to highlight, draw, and add text. If you don’t need to make any edits, simply save the image by clicking the disk icon in the upper left-hand corner.
- When you save the image, you will be able to choose the file format and the location where you would like to save it. Once the image is saved, you can open it and copy and paste it into any document or program.
The Snipping Tool is an easy and efficient way to copy and paste images from your screen. It is a great alternative to using additional software or taking screenshots. With the Snipping Tool, you can select the type of snip you would like to take, make edits, and save the image in the file format of your choice. Once the image is saved, you can copy and paste it into any document or program.
What Are 3 Ways To Take A Screenshot On A PC?
There are several ways to take screenshots on a PC. The three most popular methods are through the Print Screen key, the Snipping Tool, and the Snip & Sketch App.
Print Screen Key
The Print Screen key is a physical key on the keyboard of most computers. It is usually labeled “PrtScn,” “PrntScrn,” “Print Scr,” or a similar abbreviation. To take a screenshot using the Print Screen key, press the “Fn” and “Print Screen” keys at the same time. This will capture an image of the entire screen and save it to the clipboard. To view the screenshot, open an image editing program such as Paint or Photoshop and paste the image from the clipboard.
Snipping Tool
The Snipping Tool is a built-in screenshot utility in Windows. This tool allows users to capture a screenshot of a specific area of the screen, the entire screen, or a single window. To open it, press the Windows key and search for “Snipping Tool.” Then, select the type of snip you would like to take, draw the shape of the image you want to capture, and save the image.
Snip & Sketch App
The Snip & Sketch App is a newer screenshot utility in Windows 10. It has more features than the Snipping Tool and is easier to use. To open it, press the Windows key and search for “Snip & Sketch.” Then, select the type of snip you would like to take, draw the shape of the image you want to capture, and save the image.
Overall, there are three main ways to take screenshots on a PC: using the Print Screen key, the Snipping Tool, and the Snip & Sketch App. All three methods are easy to use and provide users with the ability to capture images of their screen.
Windows 10 Snipping Tool Shortcut
Windows 10 includes a snipping tool which can be used for taking screenshots for various purposes. Snipping Tool is a great way to capture screenshots of windows, menus, or any other part of the screen.
To use the Snipping Tool in Windows 10, go to the Start menu, type “Snipping Tool”, and open the program. You can also use the keyboard shortcut (Windows key + Shift + S) to open the snipping tool. Once the snipping tool is open, you can choose one of four modes for taking screenshots: Free-form, Rectangular, Window, and Full-screen.
For taking a screenshot, select your desired snipping mode and then drag your cursor to select an area of your screen to capture. Once you have selected the area, the screenshot will be taken and the snipping tool window will open. You can then add annotations, arrows, and highlights to the screenshot and save it as an image file.
Snipping Tool is a convenient way to quickly take screenshots, annotate them, and save them for future reference. It is easy to use and can be used to capture various parts of the screen.
Snipping Tool Download For Windows 10
Snipping Tool is a Microsoft Windows screenshot utility included in Windows Vista, Windows 7, Windows 8, Windows 8.1 and Windows 10. It is a replacement of the former Windows XP utility, known as the Snipping Tool. It can take still screenshots of an open window, rectangular areas, a free-form area, and the entire screen. The screenshots can then be annotated and saved as an image file.
To Download Snipping Tool for Windows 10:
- Go to the Microsoft Store on your Windows 10 device.
- Type “snipping tool” in the search box and select the app from the search results.
- Click the “Get” or “Install” button to download and install the app.
- Once the app is downloaded, you can open it from the start menu.
Once you have downloaded the Snipping Tool app, you can use it to capture screenshots. You can capture a full screen, an active window, a rectangular area, or a free-form area. You can also annotate the screenshot and save it in various image formats. The Snipping Tool makes it easy to capture and share screenshots on Windows 10.
Snipping Tool Shortcut
The Snipping Tool is a great way to capture screenshots in Windows 10. It allows you to capture a specific window, rectangular area, or full screen. To use the Snipping Tool, you can use the keyboard shortcut: Windows Key + Shift + S. This will bring up the snipping tool which you can use to select your desired snipping area.
Once you have selected the area, the Snipping Tool will take a screenshot of the selected area and then open the screenshot in a new window. Here you can annotate the screenshot with a pen or highlighter, save the screenshot, or copy it to the clipboard. The snipping tool also has a timer feature, which allows you to delay the screenshot for up to 5 seconds. This is useful if you need to capture a screenshot of something that requires a few seconds to load.
The Snipping Tool is a great way to quickly and easily capture screenshots in Windows 10. It is easy to use and the timer feature makes it even more convenient. With the Snipping Tool, you can quickly capture screenshots of any window, rectangular area, or full screen with just a few clicks.
Snipping Tool Windows 11
The Snipping Tool is a great way to capture screenshots on Windows 10. It’s easy to use and can be used to capture anything from a single window to your entire screen. In this tutorial, we will show you how to use the Snipping Tool in Windows 10.
To open the Snipping Tool in Windows 10, press the Windows key on your keyboard and type “snipping tool”. The program should appear at the top of the search results. Click the icon to launch the application.
Once the Snipping Tool is open, you’ll see the interface which is pretty simple. There are four buttons at the top of the window: New, Cancel, Options, and Mode. The New button will start a new snip, the Cancel button will cancel the current snip, the Options button will open Snipping Tool’s options window, and the Mode button will let you choose the type of snip you want to create.
You can choose between Free-form snip, Rectangular snip, Window snip, and Full-screen snip. Depending on which mode you choose, the way you take the screenshot will be slightly different.
Once you’ve chosen the type of snip you want to take, click the New button. Your screen will be dimmed and you can select the area you want to capture. When you’ve selected the area, it will be copied to the Snipping Tool’s window.
You can then annotate it, save it, email it, or print it from the Snipping Tool’s window. To save it, click the floppy disk icon at the top of the window and select the folder where you want to save it.
The Snipping Tool is a great way to quickly and easily capture screenshots on Windows 10. It’s easy to use and you can capture a variety of different types of screenshots. Give it a try today!
How To Snip On Windows
Snipping Tool is a screenshot utility included in Windows 10 and earlier versions of Windows. It is used to take screenshots and save them as image files. This tutorial will provide you a step-by-step guide on how to use the Snipping Tool in Windows 10.
Steps:
- Open the Snipping Tool by searching for it in the Start Menu or Cortana search bar. On the Start Menu, type “snipping tool” to search for it.
- After opening the Snipping Tool, click on the drop-down arrow next to the “New” button and select the type of snip you want to create: free-form, rectangular, window, or full-screen snip.
- Drag the cursor around the area of your screen that you want to capture. To take the screenshot, just release the cursor.
- The screenshot will be opened in the Snipping Tool window. Here, you can make any edits that you want to make in the screenshot.
- Once you are done, click the “Save” button to save the screenshot as an image file.
You can also access additional options of the Snipping Tool by clicking on the down arrow next to the “New” button. These include the ability to delay a screenshot by up to 5 seconds, copy the snip to the clipboard, and email it. With the Snipping Tool in Windows 10, you can easily take screenshots and save them as image files.
Snipping Tool Download
The Snipping Tool is a free utility available on Windows 10 operating systems that allows users to take screenshots of their computer screen. It has many useful features, such as the ability to capture a whole screen, an active window, a rectangular region, and a free-form region. It also allows users to annotate the screenshot with a pen or highlighter. In this tutorial, we will show you how to use the Snipping Tool on Windows 10.
- Press the Windows key + R to open the Run command.
- Type in “SnippingTool” and press Enter.
- The Snipping Tool will open up.
- You can now choose to take a Free-form Snip, a Rectangular Snip, a Window Snip, or a Full-screen Snip.
- Once you have chosen your snip type, the screen will freeze and you can draw your snip area, or select the window or full-screen option.
- Once you have taken the shot, the snip will open up in a new window.
- You can annotate the screenshot with the pen or highlighter tool.
- When you are done, you can save the snip by clicking the disk icon or share it with the share icon.
The Snipping Tool is a great way to take screenshots on Windows 10 computers. It has many useful features and is easy to use. With its simple interface, you can quickly take and annotate screenshots to use for presentations, tutorials, or other projects.
How To Screenshot On Windows
The Snipping Tool is a great tool for taking screenshots on Windows 10. It allows users to capture a portion of the screen, or the entire screen, and save it as an image file.
To use the Snipping Tool in Windows 10, open the Start menu and type “Snipping Tool” into the search bar. Select the Snipping Tool from the search results.
Once the Snipping Tool is open, select the type of screenshot you wish to take. You can take a rectangular snip, a free-form snip, a window snip, or a full-screen snip.
To take a screenshot, select the snip type, then click and drag the cursor over the area that you want to capture. You can also use the Delay feature to set a timer before the screenshot is taken.
Once you have taken the screenshot, it will open in the Snipping Tool’s editing window. Here you can annotate the image with various tools such as a pen, highlighter, or eraser. When you have finished, click the Save icon to save the image to your computer.
This is a great way to quickly and easily take screenshots in Windows 10.
Snipping Tool Chromebook
Unfortunately, Chromebooks don’t have a built-in snipping tool like Windows 10 does. However, there are some alternatives that you can use to capture screenshots on a Chromebook.
The first option is to use the keyboard shortcut. To take a screenshot of the entire screen, press Ctrl + Window Switcher key (the Overview key). To take a screenshot of a specific area, press Ctrl + Shift + Window Switcher key.
The second option is to use a Chrome extension. There are various extensions that you can download from the Chrome Web Store, such as the Chrome Screenshot extension. To take a screenshot with the extension, click the extension’s icon in the Chrome toolbar, select the area you want to capture, and then click the Save button.
The third option is to use a third-party application. There are many web-based applications that you can use to take screenshots of your Chromebook, such as the Snagit application. To use Snagit, open the application, select the area you want to capture, and then click the Capture button.
How to use Snipping Tool in Windows 10
If you want to take screenshots of your Windows 10 computer, the Snipping Tool is a great choice. It is easy to access, simple to use, and provides multiple options for capturing your screen. With a few clicks, you can capture the entire screen, a specific window, or even a custom selection of your screen. Plus, you can save your captures as a file or copy them to the clipboard for easy sharing. With the Snipping Tool, you can take screenshots of your computer with ease.
In conclusion, the Snipping Tool is an exceptional tool for taking screenshots of your Windows 10 computer. With a few clicks, you can capture whatever you need and share it quickly and easily. Whether you need to capture the entire screen or just a portion, the Snipping Tool makes it easy.