


How to Write Does Not Equal in Excel?

Excel is an invaluable tool for businesses and organizations, but understanding how to write does not equal in Excel can be a challenge. It’s vital to know how to properly use the formula when creating financial spreadsheets and other documents. In this article, we’ll explain exactly what “does not equal” means in Excel, when to use it, and how to get it to work correctly. By the end, you’ll have a better understanding of how to write does not equal in Excel.
How to Write Does Not Equal in Excel?
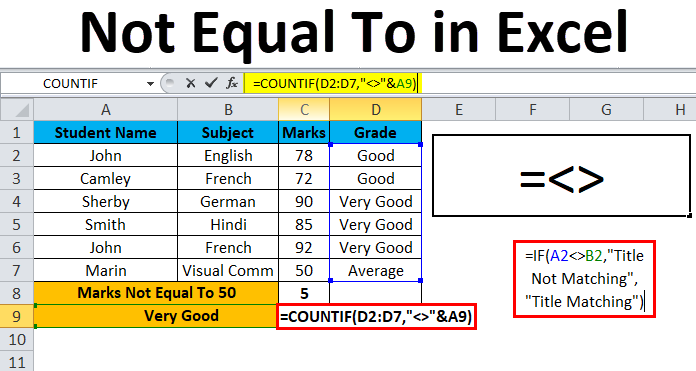
You can write the “Does Not Equal” operator in Excel using the “<>” symbol. Here’s how to use it in your formulas:
- Open your Excel worksheet.
- Type in your formula, starting with an equal sign. For example: =A1<>B1
- Replace the “<>” operator with the cell references that you want to compare. For example: =A1<>B1
- Press Enter to calculate the formula.
The “<>” operator will return TRUE if the two values are not equal, and FALSE if they are equal.
Understanding How to Write Does Not Equal in Excel
Writing “does not equal” in Excel is a simple process that should take less than a minute to complete. This type of comparison is commonly used in mathematical equations and when sorting data for various reasons. Excel allows users to compare two values against one another and determine if they are not equal. This can be done using a comparison operator known as the not equal to operator. This article will provide a step-by-step guide on how to write does not equal in Excel.
The first step to writing “does not equal” in Excel is to open the worksheet you want to work on. Once the worksheet is open, select the cell or cells you want to compare. Now, enter the comparison operator. The not equal to operator is represented by two symbols; an equal sign and an exclamation point. To write the not equal to operator, press the equal sign (=) and then the exclamation point (!). This will be the comparison operator you use to compare the two values in the cell.
The next step is to enter the values you want to compare. This can be done by selecting the cell and entering the value on the right-hand side of the operator. Once you have entered the values, press the Enter key to complete the equation. Your equation should look something like this: “=!value1”. This equation will return a value of “TRUE” if the two values are not equal and “FALSE” if the two values are equal.
Using the Not Equal to Operator for Advanced Functions
The not equal to operator can also be used for more advanced functions in Excel. For example, you can use the operator to compare two ranges of cells and determine if their values are not equal. This type of comparison is most commonly used when sorting data. To do this, you must first select the two ranges of cells you want to compare. Then, enter the not equal to operator followed by the two values you want to compare. Your equation should look something like this: “=!range1”. This equation will return a value of “TRUE” if the two ranges of cells are not equal and “FALSE” if the two ranges of cells are equal.
Using the Not Equal to Operator for Conditional Formatting
The not equal to operator can also be used for conditional formatting in Excel. This type of comparison is most commonly used to highlight cells in a worksheet that contain values that are not equal. To do this, you must first select the cells you want to compare. Then, enter the not equal to operator followed by the two values you want to compare. Your equation should look something like this: “=!value1”. This equation will highlight the cell if the two values are not equal.
Using the Not Equal to Operator for Filtering Data
The not equal to operator can also be used for filtering data in Excel. This type of comparison is most commonly used to filter out data that contains values that are not equal. To do this, you must first select the data you want to filter. Then, enter the not equal to operator followed by the two values you want to compare. Your equation should look something like this: “=!value1”. This equation will filter out the data if the two values are not equal.
Using the Not Equal to Operator for Calculations
The not equal to operator can also be used for calculations in Excel. This type of comparison is most commonly used to calculate the difference between two values that are not equal. To do this, you must first select the two values you want to compare. Then, enter the not equal to operator followed by the two values you want to compare. Your equation should look something like this: “=!value1”. This equation will calculate the difference between the two values if they are not equal.
Using the Not Equal to Operator for Logical Tests
The not equal to operator can also be used for logical tests in Excel. This type of comparison is most commonly used to test if two values are not equal. To do this, you must first select the two values you want to compare. Then, enter the not equal to operator followed by the two values you want to compare. Your equation should look something like this: “=!value1”. This equation will return a value of “TRUE” if the two values are not equal and “FALSE” if the two values are equal.
Frequently Asked Questions
Writing in Excel is an entirely different skill set than writing in other formats, such as Word or PowerPoint. Although the two may seem similar, they are drastically different and require different techniques. Mastering the art of writing in Excel can be beneficial for any professional seeking to increase their productivity, streamline their workflow, and even improve their data presentation. With a few tips and tricks, you can become an Excel expert in no time.