


Where is Spell Check in Outlook?

Are you struggling to find the spell check feature in Outlook? You’re not alone! With so many features and options, it can be difficult to locate the spell check tool. Fortunately, we have the perfect solution for you. In this article, we’ll provide step-by-step instructions on how to locate and use the spell check feature in Outlook. So, if you’re looking for help with finding spell check in Outlook, you’ve come to the right place!
Spell Check in Outlook: Spell check in Outlook is available with the Review tab in the ribbon menu. To use it, open an Outlook message, click the Review tab, then click Spelling & Grammar. Outlook checks spelling automatically when you click Send, but you can run a check at any time by clicking Spelling & Grammar. If Outlook finds a misspelled word, it automatically suggests corrections. You can choose to accept a suggestion or ignore it.
How to Find the Spell Check Feature in Outlook
Microsoft Outlook is a powerful email client that comes with a built-in spell check feature. Spell check is an effective tool for ensuring that emails, messages, and other documents are free of spelling errors. If you’re new to Outlook, you may be wondering where to find the spell check feature. This article will explain how to find and use the spell check feature in Outlook.
Enabling the Spell Check Feature
The first step in using the spell check feature in Outlook is to make sure that it is enabled. To do this, go to the Outlook Options menu, select the Mail tab, and then click on the Spelling and Autocorrect button. In the Spelling and Autocorrect window, make sure that the Check spelling as you type box is checked. This will enable the spell check feature in Outlook.
Using the Spell Check Feature
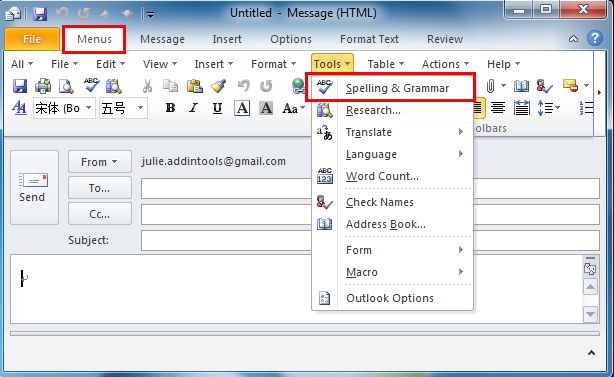
Once the spell check feature is enabled, you can use it by clicking the Review tab at the top of the Outlook window, and then clicking the Spelling & Grammar button. This will bring up the Spelling window, which will display any spelling errors that have been detected in the document. You can then use the options in the Spelling window to correct any errors that have been detected.
Using the AutoCorrect Feature
In addition to the spell check feature, Outlook also has an AutoCorrect feature that can be used to automatically correct common spelling errors. To enable this feature, go to the Outlook Options menu, select the Mail tab, and then click on the Spelling and Autocorrect button. In the Spelling and Autocorrect window, make sure that the Replace text as you type box is checked. This will enable the AutoCorrect feature in Outlook.
Using the AutoCorrect Feature
Once the AutoCorrect feature is enabled, it will automatically correct common spelling errors as you type. If you make a mistake and the AutoCorrect feature corrects it, you can undo the correction by pressing the Ctrl + Z keys. This will bring up the Undo Autocorrect window, which will allow you to undo the correction.
Using the AutoCorrect Options
In addition to automatically correcting spelling errors, the AutoCorrect feature also has a number of options that you can use to customize how it works. To access these options, go to the Outlook Options menu, select the Mail tab, and then click on the Spelling and Autocorrect button. In the Spelling and Autocorrect window, click on the AutoCorrect Options button. This will bring up the AutoCorrect Options window, which will allow you to customize how the AutoCorrect feature works.
Using the Research Tool
In addition to the spell check and AutoCorrect features, Outlook also has a Research tool that you can use to quickly look up words and phrases. To access this tool, go to the Review tab, and then click on the Research button. This will bring up the Research pane, which will allow you to quickly look up words and phrases online.
Using the Thesaurus Tool
The Research tool also includes a Thesaurus tool that you can use to quickly find synonyms for words and phrases. To access this tool, go to the Research pane, click on the Thesaurus button, and then type in the word or phrase you want to find a synonym for. This will bring up a list of synonyms that you can use in your document.
Related FAQ
Q1: Where is Spell Check in Outlook?
A1: Spell Check is located in the Outlook Ribbon, under the Review tab. To access Spell Check, simply click on the Review tab and then click on the Spell Check button. This will launch the Spell Check window, where you can review any spelling or grammar mistakes. You can also access other features such as AutoCorrect, Thesaurus, and other options from this window.
Q2: How do I enable Spell Check in Outlook?
A2: Spell Check is enabled by default in Outlook, so you don’t need to do anything to enable it. However, if you have disabled Spell Check, you can easily re-enable it by going to the File tab in Outlook, then clicking Options. From there, navigate to the Mail tab, then click on the Spelling and Autocorrect button. Make sure the checkbox next to “Check spelling as you type” is checked, and then click OK.
Q3: Is there a way to manually spell check an email in Outlook?
A3: Yes, you can manually spell check an email in Outlook. Simply click on the Review tab, then click on the Spelling & Grammar button. This will launch the Spell Check window where you can review any spelling or grammar mistakes. Once you have finished checking for mistakes, click on the Close button to close the window.
Q4: How do I add words to the Outlook Spell Check dictionary?
A4: To add words to the Outlook Spell Check dictionary, simply click on the Review tab, then click on the Spelling & Grammar button. This will launch the Spell Check window. From there, click on the Add to Dictionary button to add the word to the dictionary. The word will now be accepted as correct by Outlook’s Spell Check.
Q5: What happens if I don’t use Spell Check in Outlook?
A5: If you do not use Spell Check in Outlook, you run the risk of sending emails with incorrect spelling and grammar. This can lead to misunderstandings and confusion, and can make your emails look unprofessional. Therefore, it is recommended that you use Spell Check to ensure that all of your emails are spelling and grammar mistakes free.
Q6: Does Outlook have a built-in grammar check feature?
A6: Yes, Outlook does have a built-in grammar check feature. To access this feature, simply click on the Review tab, then click on the Spelling & Grammar button. This will launch the Spell Check window, where you can review any grammar mistakes. You can also choose to accept any suggested corrections, or ignore them.
Outlook – how to turn on spell check
Spell check in Outlook is an incredibly useful tool for any writer. By enabling you to quickly and easily review your work for any spelling errors, it can help you to produce a high-quality document quickly and easily. With the Spell Check feature, Outlook can help you maintain a professional level of writing.