


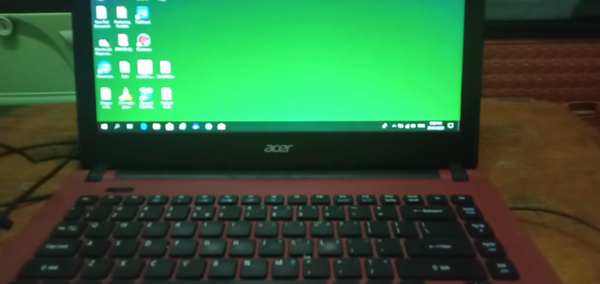
How to Screenshot Acer Laptop Windows 10?

Are you looking for a quick and easy way to capture what you see on your Acer laptop's Windows 10 screen? Taking screenshots is a great way to save what’s on your screen as an image, and it’s surprisingly simple to do.
In this article, we’ll show you how to take a screenshot on the Acer laptop with Windows 10.
How to Screenshot Acer Laptop Windows 10
- Press the Windows logo key + PrtScn
- The screen will dim momentarily to indicate that a screenshot was taken.
- Open the Pictures folder, and go to the Screenshots folder.
- The screenshot is labeled with a number.
How to Take Screenshots on Acer Laptop Running Windows 10
Taking screenshots on an Acer laptop running Windows 10 is an easy process and can be done in a few simple steps. Screenshots are incredibly useful for capturing moments, transferring information, and for troubleshooting computer issues. In this article, we'll discuss the different ways to take screenshots on an Acer laptop running Windows 10.
Using the Print Screen Key
The simplest way to take a screenshot on an Acer laptop running Windows 10 is by using the Print Screen (PrtSc) key. This key is usually located on the right side of the keyboard, near the top row of function keys.
All that needs to be done is to press the Print Screen key and the entire screen will be captured and stored in the clipboard. To save the screenshot, open an image editing software such as Microsoft Paint and paste (Ctrl + V) the image.
The Print Screen key is also useful for capturing only a portion of the screen. To do this, press the Alt + Print Screen keys together. This will capture only the active window and store it in the clipboard. Again, open an image editing software and paste the image to save it.
Using the Windows Snipping Tool
The Windows Snipping Tool is a built-in application that allows users to take screenshots of various sections of the screen. To open the Snipping Tool, open the Start menu and type “snipping tool” in the search bar. Click on the application to open it.
The Snipping Tool allows users to select the type of screenshot they wish to take. The four types of screenshots that can be taken are: Free-Form, Rectangular, Window and Full-Screen.
Depending on the type of screenshot desired, choose the corresponding option. Once the screenshot is taken, it will be stored in the clipboard and can be saved as an image file.
Using Third-Party Applications
There are many third-party applications available that can be used to take screenshots. These applications are often more feature-rich and offer advanced options such as annotating, cropping, and blur effects. Some of the popular applications for taking screenshots on Windows 10 include Greenshot and Lightshot.
Using Keyboard Shortcuts
Windows 10 also offers keyboard shortcuts for taking screenshots. The keyboard shortcut for taking a screenshot of the entire screen is Windows + Print Screen.
This will take a screenshot of the entire screen and automatically save it as an image file in the Screenshots folder on the computer. Similarly, to take a screenshot of a particular window, press Alt + Print Screen.
This will take a screenshot of the active window and store it in the clipboard. To save the screenshot, open an image editing software such as Microsoft Paint and paste (Ctrl + V) the image.
Using the Windows Game Bar
The Windows Game Bar is a built-in application that can be used to take screenshots and record videos of games. To open the Game Bar, press the Windows + G keys together.
This will open the Game Bar, which has options for taking screenshots and recording videos. To take a screenshot, click on the camera icon. This will take a screenshot of the game and will be stored in the Videos folder on the computer.
Using the Xbox App
The Xbox App is another built-in application that can be used to take screenshots. To open the Xbox App, open the Start menu and type “Xbox” in the search bar. Click on the application to open it.
On the left side of the application, there will be an option for “Take a Screenshot”. Click on this option to take a screenshot of the game and store it in the Captures folder on the computer.
Related FAQ
How to Take a Screenshot on an Acer Laptop Running Windows 10?
Answer: Taking a screenshot on an Acer laptop running Windows 10 is easy. To capture your entire screen, press the ‘PrtSc’ (Print Screen) button on your laptop’s keyboard.
This will save the screenshot to your clipboard and you can paste it in any image application such as Paint or any other photo editing software.
Alternatively, you can also press the Windows key + ‘PrtSc’ button to save the screenshot as an image file in your ‘Pictures’ folder.
What if I Want to Take a Screenshot of Just a Part of My Screen?
Answer: To take a screenshot of a specific part of your screen, press the Windows key + Shift + S. This will open a ‘Snipping Tool’ window where you can select the area of the screen you want to capture.
After selecting the area, click the ‘Save As’ button to save the screenshot as an image file in your ‘Pictures’ folder.
How Do I Take a Screenshot with a Keyboard Shortcut?
Answer: To take a screenshot with a keyboard shortcut, press the Windows key + PrtSc. This will save the screenshot as an image file in your ‘Pictures’ folder. You can also press Alt + PrtSc to save a screenshot of the active window to the clipboard.
Where is the 'Print Screen' Button on an Acer Laptop?
Answer: The ‘Print Screen’ (PrtSc) button is usually located at the top right of your Acer laptop’s keyboard, usually on the same key as the ‘Fn’ or ‘Function’ key. It is usually labeled with either ‘PrtSc’ or ‘PrtScn’.
What if I Don't Have a 'PrtSc' Button?
Answer: If your Acer laptop does not have a ‘PrtSc’ button, you can still take screenshots by using the Windows key + Shift + S keyboard shortcut to open the ‘Snipping Tool’ window.
You can then select the area of the screen you want to capture and save it as an image file in your ‘Pictures’ folder.
Can I Take a Screenshot with Just My Mouse?
Answer: Yes, you can take a screenshot with just your mouse. To do so, press the Windows key + Shift + S to open the ‘Snipping Tool’ window. Select the area of the screen you want to capture and save it as an image file in your ‘Pictures’ folder.
How To Take A Screenshot On Laptop | Acer Windows 10 Laptop
In conclusion, taking a screenshot on an Acer Laptop running Windows 10 is a straightforward process. With the right tools and a few simple steps, you can make capturing and sharing your screen an easy and efficient process.
Whether you’re new to Windows 10 or an experienced user, this guide should help you capture and share your screen in no time.