


How to Make Brochure in Microsoft Publisher 2007?

Are you looking for an easy way to create a professional-looking brochure for your business or organization? Microsoft Publisher 2007 offers a great solution for creating a stunning brochure quickly and easily. In this guide, we’ll take you through the step-by-step process of how to make a brochure in Microsoft Publisher 2007, from choosing a template, customizing your design, adding text and images, and finally, printing your brochure. So, let’s get started!
Making a Brochure in Microsoft Publisher 2007:
- Open Microsoft Publisher 2007 and select the “Publications for Print” option.
- Choose the “Create a New Publication” option and select “Brochure” from the list.
- Choose the desired size and orientation of the brochure.
- Drag and drop the desired objects and images from the left pane to the brochure.
- Customize the colors, fonts, and images as desired.
- Save the brochure as desired.
Making a Brochure with Microsoft Publisher 2007
Creating a brochure with Microsoft Publisher 2007 is a simple task that can be completed in a few easy steps. With Microsoft Publisher 2007, users have the ability to make a brochure using a template or create their own design from start to finish. Whether you are making a brochure for personal or business use, Publisher 2007 allows you to make the perfect brochure for your needs.
Step 1: Choosing a Template
The first step in making a brochure with Microsoft Publisher 2007 is to choose a template. Publisher 2007 comes with a variety of templates that are designed for different purposes such as business, education, or personal use. Once you have chosen a template, you can customize it to fit your needs. You can change the text, font, and graphics to customize the template to your liking.
Step 2: Customizing Your Brochure
Once you have chosen your template, the next step is to customize your brochure. You can add text, graphics, and images to make the brochure more appealing. You can also change the font and color of the text to match the overall design of your brochure. If you are creating a brochure for a business, you can add your company logo or other graphics to make the brochure more professional.
Step 3: Printing Your Brochure
Once you have finished customizing your brochure, the next step is to print it. You can print your brochure on regular paper or cardstock. For best results, use high-quality paper and a good quality printer. You can also choose to print your brochure in different sizes such as half-sheet, full-sheet, or folded.
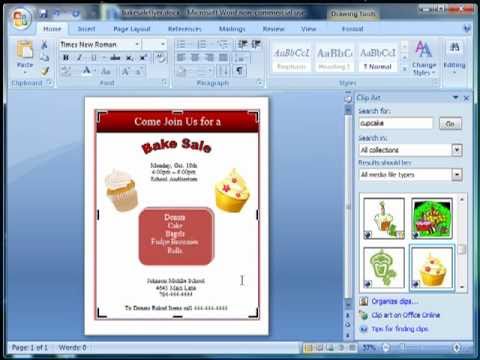
Adding Graphics and Images
Adding graphics and images to your brochure can make it even more attractive. You can use Publisher 2007’s built-in graphics and images, or you can add your own graphics and images from other sources. You can also use Publisher 2007’s library of clip art and stock photos to enhance your brochure.
Step 1: Finding Graphics and Images
The first step in adding graphics and images to your brochure is to find the ones you want to use. You can use Publisher 2007’s built-in library of graphics and images, or you can search for graphics and images online. You can also use other sources such as stock photo websites or free image sites.
Step 2: Inserting Graphics and Images
Once you have found the graphics and images you want to use, the next step is to insert them into your brochure. To do this, open the Insert tab in Publisher 2007 and select the graphic or image. Once you have selected the graphic or image, it will be inserted into your brochure. You can then position, resize, and rotate it to fit your needs.
Publishing Your Brochure
Once you have finished creating and customizing your brochure, the next step is to publish it. You can publish your brochure by printing it or by saving it to a file. If you choose to print your brochure, you can choose the paper size, orientation, and printer settings to customize your printout. If you choose to save your brochure to a file, you can save it as a PDF or other supported file format.
Step 1: Saving Your Brochure as a File
The first step in publishing your brochure is to save it as a file. To do this, open the File menu in Publisher 2007 and select the Save As option. In the Save As dialog box, select the file format you want to save your brochure in such as PDF or Word. Once you have chosen the file format, click the Save button to save your brochure.
Step 2: Printing Your Brochure
Once you have saved your brochure as a file, the next step is to print it. To do this, open the File menu in Publisher 2007 and select the Print option. In the Print dialog box, select the printer, paper size, and orientation that you want to use for your brochure. Once you have made your selections, click the Print button to print your brochure.
Few Frequently Asked Questions
How do I open Microsoft Publisher 2007?
To open Microsoft Publisher 2007, you need to first launch Microsoft Office 2007. To do this, click the Start icon in the bottom left corner of your screen and select ‘All Programs’. Scroll down to the Microsoft Office folder, and click on Publisher 2007. This will open a blank page in Publisher, where you can start creating your brochure.
How do I make a brochure in Microsoft Publisher 2007?
Creating a brochure in Microsoft Publisher 2007 is a relatively straightforward process. To begin, open the ‘Publications for Print’ menu from the left-hand side of the screen. Select ‘Brochures’ from the list of publication types. From here, you can choose from a variety of professionally designed templates, or create a brochure from scratch. You can customize the template by adding images, text, shapes, and other elements. Once you’re finished, you can save your brochure and print it.
How do I add text to my brochure in Microsoft Publisher 2007?
Adding text to your brochure in Microsoft Publisher 2007 is simple. First, click on the ‘Insert’ tab at the top of the screen. Select ‘Text Box’ from the list of options, and draw a text box on your brochure. You can then type or paste in your text. You can customize the text by changing the font, size, color, alignment, and more. Once you’re finished, click outside of the text box to save your changes.
How do I insert images in my brochure in Microsoft Publisher 2007?
Inserting images in your brochure in Microsoft Publisher 2007 is easy. First, click on the ‘Insert’ tab at the top of the screen. Select ‘Picture’ from the list of options and choose the image you want to insert. You can also insert images from the internet, by selecting ‘Clip Art’ from the same menu. Once your image is inserted, you can resize and re-position it to suit your needs.
How do I save and print my brochure in Microsoft Publisher 2007?
Once you’ve finished creating your brochure in Microsoft Publisher 2007, you can save and print it. To save your brochure, click on the ‘File’ tab at the top of the screen and select ‘Save As’. Choose the location where you want to save your brochure and click ‘Save’. To print your brochure, click on the ‘File’ tab, select ‘Print’, and choose your printer. Click ‘Print’ to print your brochure.
How do I share my brochure in Microsoft Publisher 2007?
Once you have finished creating your brochure in Microsoft Publisher 2007, you can easily share it with others. To do this, click on the ‘File’ tab at the top of the screen and select ‘Save and Send’. From here, you can choose to share your brochure via email, or save it as a PDF file. You can also save your brochure as an image, or upload it to a website or blog.
Microsoft Publisher 2007 is a great tool for creating aesthetically pleasing brochures. With its user-friendly interface, you can easily create brochures with a professional look. Whether you’re a beginner or a veteran, this guide has provided you with a comprehensive overview of how to make a brochure in Microsoft Publisher 2007. You should now be familiar with the basics of creating a brochure with Microsoft Publisher 2007, from working with the design templates to adjusting the layout and using text and graphics. With the help of this guide, you can quickly and easily create professional-looking brochures that will leave a lasting impression.