


How to Set Tabs in Microsoft Word?

As a writer, you know how important it is to make your documents look professional and clean. Microsoft Word offers an array of tools to help you achieve the perfect layout, and one of these tools is tab stops. Tab stops allow you to easily create tabular text, adjust indents and align multiple columns of text. In this guide, we will walk you through the steps on how to set tabs in Microsoft Word.
Setting Tabs in Microsoft Word
Microsoft Word is an important part of any person’s digital toolkit. It is versatile enough to be used for a variety of tasks, including setting up a document with tabs. Setting up tabs can be a bit tricky, but with the right steps and techniques, the process can be quite simple. In this article, we’ll explain how to set tabs in Microsoft Word.
Tabs are a great way to organize information. They are used to separate text and make it easier to read. Microsoft Word has a few different ways to set tabs, including the Tab button, the Ruler, and the Formatting Palette. Each one has its own advantages and disadvantages, so it’s important to understand which one is best for your particular situation.
Using the Tab Button in Microsoft Word
The Tab button is the most basic way of setting tabs in Microsoft Word. It is a small button with a right-facing arrow on it, located on the far left of the Home ribbon. When you click it, a small tab will be inserted into your document at the current cursor location. This tab can then be moved to the left or right to change its position.
The advantage of this method is that it is simple and easy to use. However, it is limited in its functionality. You can only set one tab at a time, and you cannot adjust the tab’s size or alignment.
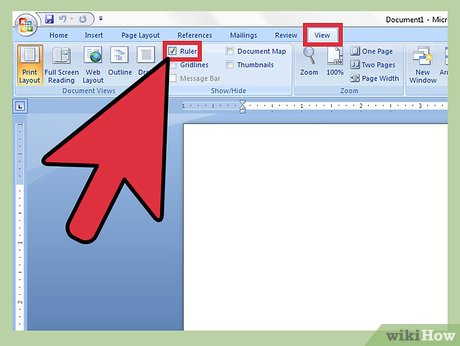
Using the Ruler in Microsoft Word
The Ruler is a long bar located at the top of the document window in Microsoft Word. It can be used to set tabs as well as adjust margins and indents. To set tabs using the Ruler, click on the tab button located at the left end of the Ruler. This will open a small dialog box with a list of tab types. Select the tab type you want and click OK.
The advantage of this method is that you can set multiple tabs at once, as well as adjust their size and alignment. The disadvantage is that it can be a bit confusing to use and it is not as intuitive as the tab button.
Using the Formatting Palette in Microsoft Word
The Formatting Palette is a small window located in the Home ribbon of Microsoft Word. It can be used to set tabs, as well as adjust margins, indents, and font settings. To set tabs using the Formatting Palette, click on the tab button located at the top of the window. This will open a small dialog box with a list of tab types. Select the tab type you want and click OK.
The advantage of this method is that it is very flexible and easy to use. You can set multiple tabs at once, as well as adjust their size and alignment. The disadvantage is that it can be a bit slower and more confusing to use than the tab button or the Ruler.
Using Tab Stops in Microsoft Word
Tab stops are a set of markers that indicate where a tab should be placed in a document. To set tab stops in Microsoft Word, open the Paragraph dialog box. At the bottom of the dialog box, there is a list of tab stops. Select the tab stop you want and click OK.
The advantage of this method is that it is very flexible and allows you to set multiple tab stops in one go. The disadvantage is that it can be a bit confusing to use and it is not as intuitive as the tab button or the Ruler.
Using the Tab Key in Microsoft Word
The Tab key can be used to quickly set tabs in Microsoft Word. To use the Tab key, press it once at the desired location in the document. This will create a tab space at the current cursor location.
The advantage of this method is that it is very quick and easy to use. The disadvantage is that it is limited in its functionality and you can only set one tab at a time.
Using the Paragraph Dialog Box in Microsoft Word
The Paragraph dialog box is a window located in the Home ribbon of Microsoft Word. It can be used to set tabs, as well as adjust margins, indents, and font settings. To set tabs using the Paragraph dialog box, click on the tab button located at the bottom of the window. This will open a small dialog box with a list of tab types. Select the tab type you want and click OK.
The advantage of this method is that it is very flexible and allows you to set multiple tabs at once, as well as adjust their size and alignment. The disadvantage is that it can be a bit slower and more confusing to use than the tab button or the Ruler.
Few Frequently Asked Questions
Q1. What is the purpose of setting tabs in Microsoft Word?
A1. Setting tabs in Microsoft Word is an important way to control the layout and formatting of documents. Tabs give you the ability to align text and objects, like images, to specific positions on the page. This allows you to create a consistent and organized look for your documents. Tabs can also be used to create columns, set margins, and indent text.
Q2. How do I set tabs in Microsoft Word?
A2. To set tabs in Microsoft Word, open the document you want to work with and click the “Layout” tab in the ribbon toolbar. Then, select “Paragraph” from the drop-down menu. In the “Paragraph” window, you will see a tab selector with a list of preset tab stops. You can choose from left-aligned, right-aligned, centered, and decimal tabs. To add a tab, click the “Tab” button and select the type of tab you want to use. You can also create custom tabs by clicking the “Set” button and entering your own tab stop values.
Q3. How do I adjust the tab stops in Microsoft Word?
A3. To adjust the tab stops in Microsoft Word, open the “Paragraph” window and select the tab stop you want to adjust. Then, click the “Set” button to open the “Tab Stop Position” dialog box. Here, you can enter a new tab stop position or change the alignment of the tab. You can also delete a tab stop by selecting it and clicking the “Clear” button.
Q4. Can I use tabs to indent text in Microsoft Word?
A4. Yes, you can use tabs to indent text in Microsoft Word. To do this, open the “Paragraph” window and select the tab stop you want to use. Then, click the “Set” button to open the “Tab Stop Position” dialog box. Here, you can enter a new tab stop position or change the alignment of the tab. You can also set the indentation level by selecting the “Indent” option in the drop-down menu.
Q5. How do I remove a tab in Microsoft Word?
A5. To remove a tab in Microsoft Word, open the “Paragraph” window and select the tab stop you want to remove. Then, click the “Clear” button to remove the tab stop. You can also remove all tab stops by selecting the “None” option in the drop-down menu.
Q6. Can I save my tab settings in Microsoft Word?
A6. Yes, you can save your tab settings in Microsoft Word. To do this, open the “Paragraph” window and select the tab stop you want to save. Then, click the “Save” button to open the “Save Tab Stop” dialog box. Here, you can enter a name for the tab stop and click “OK” to save it. To access your saved tab stops, click the “Load” button and select the tab stop you want to use.
How to set Tabs in Word
Using tab stops in Microsoft Word is a great way to make your documents look more organized and professional. Tab stops are easy to set, and they can really help you to layout your documents better. Whether you are creating a resume, a business plan or writing an essay, tab stops are a great way to make sure that your document looks its best. So give it a try and see how much easier it is to create documents with tab stops in Microsoft Word.