


How to setup Cortana and Windows search in Windows 10 Windows 11 ?

How to setup Cortana and Windows search in Windows 10 Windows 11 ?
Microsoft founder Bill Gates first articulated his vision of “information at your fingertips” back in 1994, at the dawn of the internet era. More than a quarter-century later, we’re almost there.
In Windows 10, the search box to the right of Start neatly ties together all the ways you might want to search for answers. You can quickly open apps and jump to a system setting, find local files and folders, search through your music collection, and track down a picture.
You can also extend your search to the web without having to open a browser. Type your request into the search box and get an instant answer right in Start. Or you could skip the typing and just say “Hey Cortana” to perform that search with the help of Microsoft’s webconnected intelligent assistant. If you connect Cortana to cloud services like Microsoft 365, you can get personalized answers to questions like “What’s on my calendar next week?”
Perhaps more than any other feature in Windows, the search tools have the potential to change the way you work. If your filing philosophy involves the digital equivalent of throwing everything into a giant shoebox, you’ll be startled at how easy it is to find what you’re looking for. Even if you consider yourself an extremely well-organized Windows user, we predict you’ll find ways to integrate File Explorer’s search tools into your everyday routine. But we begin with the unified search capability that sets Windows 10 apart from its predecessors.
USING WINDOWS SEARCH
Search is built into Windows 10 as an integral feature that gets prime real estate, just to the right of the Start button. By default, on desktop and laptop PCs, you’ll find a search box here. In Tablet Mode (or if you change the default setting), a search button appears, which expands to reveal a box when you tap or click it. And if even that icon is too much, you can hide it completely.
Windows 10 versions beginning with the October 2018 Update, version 1809, respond to a click in the search box with a wide panel designed to help you focus your search efforts. In version 2004, shown in Figure 10-1, you can narrow the scope of your search before you begin typing, using any of the five options at the top of the panel. The More option, as shown, opens to reveal additional search filters. Below this array at the top of the panel, Windows displays tiles for recently used programs. Below that are links to other items of possible interest—information about current events, perhaps, or recommendations for important updates.
Figure 10-1 Clicking in the search box displays these filtering options. Select one of the items along the top, and then type a search term to display a filtered results list.
For most simple tasks, such as searching for an app or a setting, the fastest route to success is to tap the Windows key and begin typing. The results, as shown in Figure 10- 2, are businesslike and efficient, with no personality. This example shows the new, wider search results experience that debuted in version 1809; in earlier releases of Windows 10, the default results list occupies a single column.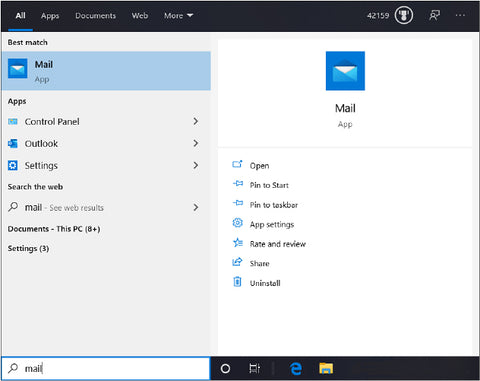
Figure 10-2 Type a word or phrase in the search box, and you get a categorized list of results that match the search term, including apps and settings.
Use the options at the top to change the search scope. Windows highlights the top item on the results list, but you can use the arrow keys to scroll up and down through the list. You can also use the mouse to select the arrow to the right of any entry and make its properties or Jump List options visible on the right side of the wide results pane. If the first pass doesn’t find the exact item you were hoping for, you can narrow the scope of the search by choosing a category from the list above the results pane.
The Apps, Documents, and Web categories are visible by default; click More to expand the list of available categories to include Email, Folders, Music, People, Photos, Settings, and Videos. Choosing one of those categories immediately changes the search results list to show only the category you selected.
Choosing a category has a simple but powerful action: It inserts a prefix in the search box, before the search term. If you’re more comfortable with the keyboard, you can accomplish the same result by typing the category prefix manually: folder: or photos:, for example.
When you enter a word or phrase in the search box, results from the web can appear directly in the results list, in a panel that pops out to the right of the initial display of search results in Start. This feature enables you to get instant answers to questions in a wide array of categories. If your question is clear and unambiguous and you have a working internet connection, your answer appears immediately, as shown in Figure 10-3.
Figure 10-3 When the best match for a search term is on the web, a pop-out like this appears to the right of the results list.
You can use this same technique for the following types of queries:
- Dates and times Use the search box to check the dates of upcoming holidays and events. (”When is Thanksgiving this year?” and “What time does the Super Bowl start?”)
- Biographical details If someone is famous enough or holds a public office, you can ask for more information. (“How old is Bill Gates?” “Who is governor of New Mexico?”)
- Definitions Not sure of the meaning of an unfamiliar word? You can view a definition in the results pane, with an option to hear the word’s pronunciation or jump to an online dictionary. (“What does phlegmatic mean?”)
- Sports scores You can see scores and standings for any team or league, even for games that are in progress.
- Stock prices To get the current price and a chart for any stock or index on a major exchange, enter a dollar sign followed by the ticker symbol: $MSFT, $DJIA.
- Weather Type weather followed by a city name to see a five-day forecast that can help you decide whether to pack an umbrella or sunscreen for an upcoming trip.
The expanded results pane can also display interactive controls. Enter an arithmetic problem, and Windows search shows the result in a calculator where you can continue your number-crunching. If you ask how to convert units of measurement, the resulting display allows you to choose from an enormous number of conversions, including length, volume, and even fuel efficiency. Figure 10-4 shows a conversion that might not be as practical as gallons to liters but could help settle a bet over your favorite space opera.
Figure 10-4 These live widgets appear in the search results when you ask a question that involves calculation or conversion.
Besides conversions, you can also do basic math by entering an appropriate query in the taskbar search box. Enter any valid mathematical format—addition, subtraction, multiplication, division, exponentiation, and more, with support for using parentheses to group operations—and see the answer directly in the results pane.
The search box is also able to look up current exchange rates and convert any amount in one currency to its equivalent in another. Feel free to be brief: For users in the United States, entering any amount with a dollar sign in front opens a conversion window with Euro selected as the target currency, as shown here. You can keep typing to specify a different target currency (for example, $195 in GBP) or use controls in the widget to change the amount, choose a different currency, or enter a new value in the second box to reverse the conversion.
The results can change with every character as you type, so feel free to use the backspace key and change your input slightly to help Search understand what you’re asking.
So far, none of what we’ve done using the search box involves Cortana. In the next section, we discuss what Cortana adds to this basic search experience.
WHAT YOU CAN (AND CAN NO LONGER) DO WITH CORTANA
If you have used Microsoft’s digital assistant, Cortana, in previous versions of Windows 10, you will notice dramatic changes beginning with version 2004. To start with, Cortana is now a standalone app, no longer visually integrated with the search box. The app is represented by the familiar circular icon, positioned by default directly to the right of the search box. Cortana, moreover, is now styled as a chat window, as shown in Figure 10-5.
Figure 10-5 Cortana, now a standalone chat-style app, is becoming a business productivity tool, although it hasn’t entirely forgotten its consumer roots.
The makeover is far more than skin deep. Where Microsoft once described Cortana as “your intelligent assistant across your life,” the company now touts it as “your personal productivity assistant in Microsoft 365” (see https://www.microsoft.com/cortana). The key terms here are productivity and Microsoft 365.
Microsoft is transitioning Cortana away from a predominantly consumer orientation to a focus on business needs, particularly as they concern tasks performed within the context of Microsoft 365 (formerly known as Office 365). In addition, to enforce enterpriselevel security and privacy needs, Cortana now insists that you be signed in to a business or school Microsoft account before it will do any meaningful work.
Though its “personality” has been muted by newfound corporate maturity, Cortana retains some of its old general-purpose skills. You can still get the weather report, sports scores, and flight-status information (all of which, of course, have always been and still are available through search, unaided by Cortana). You can formulate natural-language questions by typing or speaking (turn on Online Speech Recognition at Settings > Privacy > Speech, and enable the wake word, “Cortana,” by going to Settings > Privacy > Voice Activation and adjusting settings under the Choose Which Apps Can Use Voice Activation settings). On request, Cortana continues to offer lamentable attempts at humor. But it no longer maintains a notebook of your interests, and if you ask it to play something from your music library, it will respond with “I’m sorry, I can’t control your music here.” The mobile Cortana apps, for iOS and Android, retain more of the consumer focus. These versions, for example, continue to support the Harmon Kardon Invoke speaker, while the Windows 10 product does not.
But although its business smarts are still developing as we write in mid-2020, Cortana already shows great promise. More than a competent searcher, the app will also be a doer. You’ll be able to tell it to schedule a meeting with colleagues you name, and it will consult schedules, choose a time and place, and send the meeting invitations. You can ask it not simply to find a set of documents but also to route them to your team.
Cortana is a work in progress. Microsoft will continue to enhance it with updates from the Store. With or without the wake word, you can use the microphone icon at the right side of the Ask Cortana window to convey your needs by voice.
Removing Cortana
What if you don’t want or need a digital productivity assistant (or, for example, you don’t have a school or work Microsoft account)? If you’d prefer not to be bothered by the sight of the Cortana button alongside the search box, you can hide it by right-clicking the button and clearing the check mark next to the Show Cortana Button option.
For a more persistent solution, you can use Group Policy to disable Cortana. You’ll find several Cortana-related policies under Computer Configuration > Administrative Templates > Windows Components > Search. Doubleclick Allow Cortana and set the policy to Disabled to turn off Cortana for all users on the current device.
As for the Cortana app, you can’t uninstall it via Settings > Apps & Features, as you might expect. But you can click Advanced Options and turn the Runs At Log-in option to Off. If you absolutely insist on removing the app, you can do so with the help of Windows PowerShell.
Run PowerShell as an administrator. Then enter the following command:
Get-AppxPackage -allusers Microsoft.549981C3F5F10
| Remove-AppxPackage
CONFIGURING THE WINDOWS SEARCH INDEX
At its heart, the Windows Search service relies on a speedy, powerful, and well-behaved indexing service that does a fine job of keeping track of files and folders by name, by properties, and (in supported formats) by contents. All those details are kept in the search index, a database that keeps track of indexed file names, properties, and the contents of files. As a rule, when you do most common types of searches, Windows checks the index first and returns whatever results it finds there.
To build the index that makes its magic possible, Windows Search uses several separate processes. The index is constructed dynamically by the Windows Search service, SearchIndexer.exe. It includes metadata for all files in all locations that are prescribed to be indexed; for documents in formats that support indexing of file contents, the indexer extracts the text of the files and stores it alongside the file properties for quick retrieval.
The Windows Search service begins running shortly after you start a new Windows session. From that point on, it runs in the background at all times, creating the initial index and updating it as new files are added and existing ones are changed or deleted. Protocol handlers do the work of cracking open different data stores to add items to the index. Property handlers allow Windows Search to extract the values of properties from items and store them properly in the index. Filters extract the contents of supported file types so that you can do full-text searches for those items.
The Search service does its best to minimize the effect of its activities on the performance of your system. The indexing process steps back or stops when the system perceives peak disk usage and under other conditions:
- When gaming mode is on
- When power savings or a low power mode is on
- When your system switches from AC to DC, or your battery charge is less than 50 percent
- When CPU usage goes above 80 percent or disk usage above 70 percent
In addition, changes to the indexing algorithm in Windows 10 releases beginning in version 2004 are designed to detect high disk usage and manage the indexer so that it doesn’t negatively affect performance.
Which files and folders are in the index?
Indexing every 0 and 1 on your hard disk would be a time-consuming and space-consuming task—and ultimately pointless. When you search for a snippet of text, you’re almost always looking for something you wrote, copied, or saved, and you don’t want the results to include random program files that happen to have the same snippet embedded in the midst of a blob of code. (Yes, we know some developers might disagree, but they’re the exception.) So the default settings for the indexer make some reasonable inclusions and exclusions.
Certain locations are specifically included. These include all user profiles (but not the AppData folder), the contents of the Start menu, and, if Microsoft 365 is installed, your OneNote and Outlook data. Locally synced files from OneDrive as well as offline files stored in the client-side cache (CSC) are automatically included in your local index. You can explicitly add other folders to the index, but Windows 10 eliminates the need to do that. Instead, just right-click the folder, click Include In Library, and select an existing library or create a new one; when you do so, Windows automatically adds that folder to the list of indexed locations and begins indexing its contents without requiring additional steps on your part.
If you understand the potential impact on performance and still want to extend Windows Search to include more folders than the default, go to Settings > Search > Searching Windows and turn on Enhanced Mode. This option changes the behavior of search, returning results from across all folders and drives, including your desktop.
To see which folders are currently being indexed, open the Indexing Options dialog box. You can get there in various ways, including by entering Indexing Options in the search box on the taskbar. In Figure 10-6, the Indexing Options dialog box shows four default folders that are included in the index as well as two we’ve added to libraries.
Figure 10-6 The Indexing Options dialog box shows the top level of locations that are included in the index. Subfolders (for example, all the profile subfolders of Users) are not shown here.
To get more information about what’s being indexed, click Modify, which opens the Indexed Locations dialog box.
In its default view, the list of folders and other data stores in the Indexed Locations dialog box shows only locations that are accessible to your user account. To see (and manage) locations from other user profiles, click Show All Locations. As the User Account Control (UAC) shield icon makes clear, you need to be signed in as an administrator (or provide an administrator’s credentials) to continue.
Within that list of indexed locations, the Windows Search service records the file name and properties (size, date modified, and so on) of any file or folder. Files marked as System and Hidden are indexed but are displayed in search results only when you change File Explorer settings to show those file types. Metadata for common music, image, and video file formats is included in the index by default. The indexer also includes the
contents of a file and its custom properties if the file format has an associated property handler and filter, as is the case with most popular document formats.
To see whether a particular file format supports content indexing, open the Indexing Options dialog box, click Advanced, and then click the File Types tab. Find the extension associated with the file type and then look in the Filter Description column for the name of the filter that handles that extension. If you see File Properties Filter, the file type does not support content indexing.
File types that are supported have a named filter, such as Microsoft Office Filter, Open Document Format ODT Filter, HTML Filter, or Reader Search Handler.
The list of formats on the File Types tab on your computer might include more file types if you installed Windows programs that include custom property handlers and filters, such as the Office Open XML Format Word Filter installed with Microsoft Office 365.
Windows Search does not index the content of files that are saved without a file name extension, nor does it index the contents of files that are protected by Information Rights Management (IRM) or digital rights management (DRM).
A handful of locations are specifically excluded from indexing. Even if you manually specify that you want your system drive (normally C) to be included in the index, the following files and folders will be excluded:
- The entire contents of the \Windows folder and all its subfolders. (The Windows.old folder that’s created by an upgrade installation of Windows 10 is also excluded.)
- \$Recycle.Bin (the hidden folder that contains deleted files for all user accounts).
- \Users\Default and all of its subfolders. (This is the user profile template used to create a profile for a new user.)
- The entire contents of the \Program Files and \Program Files (x86) folders and all their subfolders.
- The \ProgramData folder (except the subfolder that contains shortcuts for the shared Start menu).
Monitoring the index and tuning indexer performance
The status message at the top of the Indexing Options dialog box offers real-time updates on what the indexer is doing at the moment. “Indexing complete” means there are no pending tasks. The status message lists the number of items (files, folders, and so on) that are currently in the index.
“Indexing paused” means the service has temporarily stopped all indexing tasks; you’ll see this message if you check the indexer status shortly after you start the computer because the default setting for the Windows Search service is Automatic (Delayed Start).
If indexing tasks are currently underway, the status message displays an increase or decrease in the number of items indexed as new, changed, and deleted files are processed. The indexer is designed to throttle itself whenever it detects that the system is working on other, presumably more important tasks. As a result, you’ll most likely be told that “Indexing speed is reduced due to user activity” when you first check.
That message indicates the indexing service has backed off in response to your activity and is operating at a fraction of its normal speed. If the number of files to be indexed is big enough (if you copied a folder with several thousand documents, for instance), you’ll see the indexing speed pick up dramatically after you keep your hands off the keyboard and mouse for a minute or so.
The exact speed of indexing depends on various factors, including the speed of your CPU and storage subsystem, as well as the number, size, and complexity of documents and whether their full contents are being indexed.
Unfortunately, the status message in the Indexing Options dialog box doesn’t include a progress bar and doesn’t indicate how many files are yet to be indexed, so there’s no easy way to tell whether the current task is barely underway or nearly complete. If you haven’t recently added any new folders to the index but have simply been changing a few files in the course of normal work, the index should stay close to complete (assuming you’ve ever had a complete index).
In the past, some websites for performance-obsessed Windows users complained about the performance hit that Windows Search causes; some even recommended disabling the Windows Search service to improve overall system performance. We recommend you leave it running. In our experience, the Windows Search service uses only a small percentage of available CPU resources even at its busiest. The indexing service is specifically designed to back off when you use your computer for other activities, switching to low-priority input/output (I/O) and allowing foreground I/O tasks, such as opening Start, to execute first. When Windows 10 first builds its index, or if you copy a large number of files to the system at once, indexing can take a long time and cause some spikes in CPU and disk activity, but you shouldn’t notice a significant impact on performance.
Some unusual indexing activity might be the result of maintenance activities, which the Search service performs automatically every 100,000 files. The operations typically last less than five minutes.
File Explorer accesses the index directly, so even if the indexer is busy processing new and changed files, it shouldn’t affect the speed of a search operation. In normal operation, retrieving search results from even a very large index should take no more than a few seconds. You might notice a delay in opening a folder that contains a large number of compressed folders, including Zip files and ISO disk images.
MANAGING FILE PROPERTIES AND METADATA
Every file you view in File Explorer has a handful of properties that describe the file itself: the file name and file name extension (which is associated with the program that opens that type of file), the file’s size, the date and time it was created and last modified, and any file system attributes. These properties are stored in the file system and are central to displaying the contents of a folder or other location and performing simple searches.
In addition to these basic file properties, many data-file formats can store custom metadata. These additional properties can be added by a device or by software; in some cases, they can be modified by the user. When you take a digital picture, your camera or smartphone might add the device make and model, exposure time, ISO speed, and other details to the file when it’s saved. When you buy a digital music track or album, the individual audio files include custom properties (often referred to as tags, from the IDv3 tag format used in MP3 files) that identify the artist, album, track number, and other details. You can also add free-form tags to digital images saved in formats that support that additional metadata.
Microsoft Word and other Microsoft Office programs automatically add your name to the Author field in documents you create; you can fill in additional properties such as keywords and comments and save them with the file.
The simplest way to view metadata for a folder is to click Details Pane on the View tab in File Explorer. Doing so opens a pane on the right that displays a thumbnail of the selected file (if a thumbnail is available), plus metadata saved as file properties. You can click through a group of files in rapid succession, with the contents of the details pane changing with each new selection.
Figure 10-7 shows these details for a photo saved in JPEG format; you can see the date the photo was taken, the make of the camera, the dimensions of the picture, the exposure settings, and quite a bit more.
Figure 10-7 The Details Pane in File Explorer shows a selection of properties from the currently selected file. Some are directly editable; others are fixed and can’t be changed.
Saving custom information as metadata can make it easier to find that file (and others like it) using the search tools we describe later in this chapter.
The properties displayed in the details pane are an excellent starting point, but they might not represent every detail available for the selected file. To see the complete list, right-click the item and click Properties (or select the item and press Alt+Enter). Then click the Details tab in the properties dialog box.
Figure 10-8 shows a side-by-side comparison of the properties dialog box and the details pane for a music track. A casual listener might not care that scrolling down through the properties dialog box reveals such exotica as Period, Mood, Beats-Per-Minute, and Initial Key, but a professional DJ can certainly find uses for those extra details.
Figure 10-8 The Details tab in a file’s properties dialog box (left) offers a more exhaustive set of editable properties than the simpler details pane (right).
In either place, the details pane or the properties dialog box, you can edit many (but not all) of the item’s properties. Some properties, such as file size, photo dimensions, and MP3 bitrate, are calculated by the file system or are otherwise fixed and cannot be directly modified. But you can edit custom metadata if the format of the underlying file allows you to do so.
To enter or change a property’s value, simply click and type. If you add two or more words or phrases to a field that accepts multiple entries (such as Tags or Authors), use semicolons to separate them. Press Enter or click Save to add the new or changed properties to the file. You can edit properties for multiple files at one time.
This is especially useful when you’re correcting an error in an album or artist name; just select all the songs in the album’s folder. When more than one file is selected, you’ll note that some properties in the details pane (such as track numbers and song titles) change to indicate that the specified field contains multiple values. A change you make to any field is written to all the files in your selection.
Metadata is saved within the file itself, using industrystandard data storage formats. Software developers who need to create a custom file format can make its metadata available to Windows by using an add-in called a property handler, which opens the file format to read and write its properties. Because metadata is saved within the file itself, the properties you edit in File Explorer or a Windows program are fully portable. This opens some useful possibilities:
- You can move files to other computers, even those running other operating systems, without losing the files’ tags and other metadata.
- You can edit a file in an application other than the one in which it was created without losing any of the file’s properties (assuming the other application properly adheres to the file format’s standard for reading and writing metadata).
- A file’s properties are visible to anyone who has read access to the file.
You can edit custom properties only in files saved using a format that accommodates embedded metadata. For digital image files, Windows supports the JPEG, GIF, and TIFF formats, but you cannot save metadata in bitmap images and graphics files saved in PNG format because these formats were not developed with metadata in mind. Among music file formats, MP3, WMA, and FLAC fully support a wide range of properties designed to make it easy to manage a music collection; files saved in the uncompressed WAV (.wav) format do not support any custom tags. Plain text and Rich Text Format (.rtf) files do not support custom metadata; files saved in Word formats expose a rich set of additional properties, as do all other native file formats from Microsoft Office programs.
In some cases, you’ll find that you’re unable to view or edit metadata in a file even though the underlying format supports metadata. In that case, the culprit is a missing property handler.
SEARCHING FROM FILE EXPLORER
To use File Explorer’s search tools, start by selecting a folder or library. That defines the scope of your search— the set of files from which you want to draw search results. (If you’re not sure which folder contains the files you’re looking for, choose Libraries or Quick Access from the navigation pane.)
Next, click in the search box in the upper-right corner of the File Explorer window. Start typing a word or phrase in the search box. As you type, File Explorer will display an abbreviated list of files and folders whose name, properties, or contents match that search term. Press Enter or click the arrow to the right of the search box, and your search results appear. At the same time, File Explorer adds a Search tab to the ribbon, under the color-coded Search Tools heading, as shown in Figure 10-9.
Figure 10-9 Entering text in the search box to the right of the address bar reveals the Search Tools tab on the ribbon.
The following rules govern how searches work:
- Whatever text you type as a search term must appear at the beginning of a word, not in the middle. Thus, entering des returns items containing the words desire, destination, and destroy but not undesirable or saddest.
- Search terms are not case sensitive. Thus, entering Bott returns items with Ed Bott as a tag or property, but the results also include files containing the words bottom and bottle.
- By default, searches ignore accents, umlauts, and other diacritical marks. If you routinely need to be able to distinguish, say, Händel from Handel, open the Indexing Options dialog box, click Advanced (for which you’ll need administrative credentials), and then select Treat Similar Words With Diacritics As Different Words.
- To search for an exact phrase, enclose the phrase within quotation marks. If you enter two or more words without using quotes, the search results list includes items that contain all of the words individually.
Search results for indexed folders appear so quickly that you might have a substantial number of results before you type the second or third character in the search string. A complicating factor: If your search term is part of a subfolder name, your results list includes the entire contents of that subfolder.
If simply entering a search term doesn’t return the needed results, you have two options. The easiest is to build a new search (or refine the current one) using the point-and-click commands on the ribbon’s Search tab. The other is to use the powerful but cryptic search syntax to build a search manually.
We start with the Search tab (under the Search Tools heading), shown in Figure 10-9. The Search tab offers a wealth of options to create and refine a search. The choices you make here return results from the current search scope. To change the scope, use the options in the Location group.
In Figure 10-10, for example, OneDrive – Personal is selected in the navigation pane, and All Subfolders (the default) is selected in the Location group on the ribbon. Clicking Date Modified and selecting Today from the drop-down list returns all files that were added or changed in all locally synced OneDrive folders today.
Figure 10-10 Among other things, the Search tab offers options to refine an existing search.
If you’re looking for an invoice you’re certain was created last month, you can click Last Month from the Date Modified list. If the set of results is still too large to scan, you can use additional options on the Search tab to refine the search, or click in the search box and enter a word or phrase that you know was in the file’s name or its contents.
Three filters get top billing in the Refine group on the Search tab:
- Date Modified This property represents the most recent date a file or folder was saved. For a downloaded program file, it shows the date you saved the file locally, not the date the developer created it.
- Kind This field shows predefined groups of file types, including those for some items that aren’t stored in File Explorer. The most common choice to make here is Document, which includes text files, any file saved in a Microsoft Office format, and PDF files. Try Music, Movie, or Picture if you’re looking for digital media files.
- Size This list shows a range of sizes. If you’re trying to clear space on your system drive, choosing Huge (1 – 4 GB) or Gigantic (>4 GB) is a good way to locate large files that can safely be deleted or archived on an external drive.
Using any of the previous three filters adds a search operator, followed by a colon and a parameter, in the search box. Clicking Other Properties on the Search tab offers additional, context-specific options to refine the search results. What makes these options different is that they fill in the name of the operator, followed by a colon, and then position the insertion point so that you can complete the definition. For a folder optimized for General Items, this list contains the following four options:
- Type Enter a file extension (pdf, xls, or docx, for example) or any part of the description in the Type field in Details view; enter Excel, for example, to return Excel workbooks in any format.
- Name Enter a string of text here. The results list will show any file or folder that contains that exact string at the beginning of any word in its name.
- Folder Path Enter a string of text here. The results list will show any file or folder that contains that exact string anywhere in its full path. If you enter doc, the results will include all files and folders in your Documents folder and any of its subfolders (because Documents is part of the path for those subfolders), as well as the contents of any other folder whose name contains a word beginning with those three letters.
- Tags Almost every data file contains this field, which is stored as metadata in the file itself. You can add one or more tags to any file using the Details pane or the Details tab in its properties dialog box.
The list of available options changes slightly for other folder types. Documents folders include Authors and Title operators, and Photos folders include Date Taken and Rating, for example.
To run the same search from a different location, click Search Again In and choose an available scope. Or just switch to a different node in the navigation pane and start again.
ADVANCED SEARCH TOOLS AND TECHNIQUES
The search capabilities in Windows 10 are direct descendants of standalone tools and Windows features that date back to the turn of the 21st century. Those original search tools relied on something called Advanced Query Syntax (AQS), which survives, only slightly modified, in a mostly undocumented form today.
You can see some vestiges of AQS when you build a search using the Search tab. Each entry you make from the ribbon adds a corresponding query to the search box. When you learn the query syntax, you can create your own advanced searches and even save them for reuse, as we explain in this section.
The most basic query typically begins with a keyword (or a portion of a word) typed in the search box. Assuming you begin typing in a location that supports indexed searches (the taskbar search box or your locally synced OneDrive folder, for example), the list of search results will include any item in that location containing any indexed word (in its name or properties or content) that begins with the letters you type. You can then narrow the results list by using additional search parameters.
Advanced queries support the following types of search parameters, which can be combined using search operators:
- File contents Keywords, phrases, numbers, and text strings
- Kinds of items Folders, documents, pictures, music, and so on
- Data stores Specific locations in the Windows file system containing indexed items
- File properties Size, date, tags, and so on
In every case, these parameters consist of a word that the search query recognizes as a property or other index operator, followed by a colon and the value to search for or exclude. (When Windows Search recognizes a word followed by a colon as a valid property, it turns that operator blue.) You can combine search terms using Boolean operators and parentheses.
The value that immediately follows the colon can take several forms. If you want a loose (partial) match, just type a word or the beginning of a word. Thus, type:Word turns up files of the type Microsoft Word Document, Microsoft Word 97 – 2003 Document, Microsoft Word 97 – 2003 Template, Microsoft Word Macro-Enabled Document, and so on. To specify a strict (exact) match, use an equal sign and, if necessary, quotation marks, as in this example:
type:=”Microsoft Word Document”
You can also use Boolean operators (AND, OR, and NOT) and parentheses to combine criteria. If you have fond memories of MS-DOS, you’ll welcome using * and ? as wildcards, and you can dramatically change the behavior of a search by means of the innocuous-looking tilde (~) character (which forces Windows to perform a strict character search in indexed locations, as discussed later in this section).
Of course, all these techniques become much more useful when you’re able to reuse your carefully crafted search criteria, as we explain in “Saving searches and clearing search history” at the end of this chapter.
Searching by item type or kind
To search for files with a particular file name extension, you can simply enter the extension in the search box, like this:
*.ext
(Note that this method of searching does not work for .exe or .msc files.) The results include files that incorporate the extension in their contents as well as in their file names—which might or might not be what you want. You’ll get a more focused search by using the ext: operator, including an asterisk wildcard and a period like this:
ext:*.txt
File name extensions are useful for some searches, but you’ll get even better results using two different search properties: Type and Kind. The Type property limits your search based on the value found in the Type field for a given object. Thus, to look for files saved in any Microsoft Excel format, type this term in the search box:
type:excel
To find any music file saved in MP3 format, type this text in the search box:
type:mp3
To constrain your search to groups of related file types, use the Kind property, in the syntax kind:=value. Enter kind:=doc, for example, to return text files, Microsoft Office documents, Adobe Acrobat documents, HTML and XML files, and other document formats. This search term also accepts folder, pic, picture, music, song, program, and video as values to search for.
Changing the scope of a search
You can specify a folder or library location by using folder:, under:, in:, or path:. Thus, folder:documents restricts the scope of the search to your Documents library, and in:videos mackie finds all files in the Videos library that contain Mackie in the file name or any property.
Searching for item properties
You can search on the basis of any property recognized by the file system.
To see the whole list of available properties, switch to Detail view in File Explorer, right-click any column heading, and then click More. The Choose Details dialog box that appears enumerates the available properties.
When you enter text in the search box, Windows searches file names, all properties, and indexed content, returning items where it finds a match with that value. That often generates more search results than you want. To find all documents of which Jean is the author, omitting documents that include the word Jean in their file names or content, you type author:jean in the search box. (To eliminate documents authored by Jeanne, Jeannette, or Jeanelle, add an equal sign and enclose jean in quotation marks: author:=”jean”.) When searching on the basis of dates, you can use long or short forms, as you please. For example, the search values
modified:9/29/19
and
modified:09/29/2019
are equivalent. (If you don’t mind typing the extra four letters, use datemodified: instead.)
To search for dates before or after a particular date, use the less-than (<) and greater-than (>) operators. For example,
modified:>09/30/2019
searches for dates later than September 30, 2019. Use the same two operators to specify file sizes below and above some value.
Use two periods to search for items within a range of dates. To find files modified in September or October 2019, type this search term in the Start menu search box:
modified:9/1/2019..10/31/2019
You can also use ranges to search by file size. The search filters suggest some common ranges and even group them into neat little buckets, so you can type size: and then click Medium to find files in the range 1 MB to 128 MB.
Again, don’t be fooled into thinking that this list represents the full selection of available sizes. You can specify an exact size range—using operators such as >, >=, <, and <=. (Also, you can use the “..” operator.) For example, size:0 MB..1 MB is the same as size:<=1 MB. You can specify values using bytes, KB, MB, or GB.
Using multiple criteria for complex searches
You can use the Boolean operators AND, OR, and NOT to combine or negate criteria in the search box. These operators need to be spelled in capital letters (or they will be treated as ordinary text). In place of the AND operator, you can use a plus sign (+), and in place of the NOT operator, you can use a minus sign (–). You can also use parentheses to group criteria; items in parentheses separated by a space use an implicit AND operator.
Using wildcards and character-mode searches
File-search wildcards can be traced back to the dawn of Microsoft operating systems, well before the Windows era. In Windows 10, two of these venerable operators are alive and well:
- The asterisk (*), also known as a star operator, can be placed anywhere in the search string and will match zero, one, or any other number of characters. In indexed searches, which treat your keyword as a prefix, this operator is always implied at the end; thus, a search for voice turns up voice, voices, and voice-over. Add an asterisk at the beginning of the search term (*voice), and your search also turns up any item containing invoice or invoices. You can put an asterisk in the middle of a search term as well, which is useful for searching through folders full of data files that use a standard naming convention. If all your invoices start with INV, followed by an invoice number, followed by the date (INV0038-20200227, for example), you can produce a quick list of all 2020 invoices by searching for INV*2020*.
- The question mark (?) is a more focused wildcard. In index searches, it matches exactly one character in the exact position where it’s placed. Using the naming scheme defined in the previous item, you can use the search term filename:INV-???? -2020* to locate any file in the current location that has a 2020 date stamp and an invoice number (between hyphens) that is exactly four characters long.
To force Windows Search to use strict character matches in an indexed location, type a tilde (~) as the first character in the search box, followed immediately by your term. If you open your Documents library and type ~??v in the search box, you’ll find any document whose file name contains any word that has a v in the third position, such as saved, level, and, of course, invoice. This technique does not match on file contents.
Searching nonindexed locations
In both the previous examples, we described the behavior of searches in indexed locations, such as a library or a folder within a library. In other locations, the grep search engine kicks in. By default, anything you enter in one of these locations is treated as a character search that can match all or any part of a word. Thus, if you open a data folder that is not in a library and enter the search term voice, you get back voices and voiceover and invoice. The behavior of wildcards varies slightly as well. In a grep search, ??voice matches invoice but not voice. In an indexed search, the wildcards at the beginning of the term are ignored in favor of loose matches. (Extra question marks at the end of a search term are ignored completely.)
When Windows does a grep search of the folder’s contents, a green progress bar traversing your address bar warns you that the search is likely to be slow. While the search is still underway, you can click the Search tab and refine the search.
By default, when searching nonindexed locations, Windows looks at file names and basic properties (date modified and size) only. You can change this behavior so that Windows searches the contents of files that include a property handler and filter. To do this, click the Search tab, click Advanced Options, and then click File Contents, as shown in Figure 10-11.
Figure 10-11 When searching in locations that aren’t part of the index, Windows looks only at file names and properties. Select this box to include the contents of files in those locations.
Be aware that choosing this option can add significantly to your search times.
SAVING SEARCHES AND CLEARING SEARCH HISTORY
After you have completed a search and displayed its results in File Explorer, you can save the search parameters for later reuse. Click Save Search on the Search tab. The saved search is stored, by default, in %UserProfile%\Searches. You can run the search again at any time, using the then-current contents of the index, by clicking that saved search in the navigation pane or Searches folder.
When you save a search, you’re saving its specification (technically, a persistedQuery), not its current results. If you’re interested in the XML data that defines the search, right-click the saved search in your Searches folder, choose Open With, and choose a text editor like Notepad or WordPad.
Recent searches are also included in a history list. To see what you have searched for, click in the search box in File Explorer and then, in the Options group on the Search tab, click Recent Searches. If the list of recent searches gets unwieldy or you want to eliminate older searches that are no longer relevant, click Clear Search History at the bottom of this list.