


How to Create a Weekly Schedule in Excel?

Are you feeling overwhelmed and disorganized with your schedule? Do you struggle to keep up with your daily tasks and activities? If so, then creating a weekly schedule in Excel is a must. With Excel, you can easily create a schedule that will allow you to keep track of your tasks and activities, helping you stay organized and on-top of your responsibilities. In this article, we’ll be discussing the various steps you’ll need to take to create a weekly schedule in Excel. We’ll also be discussing the benefits of using Excel to manage your schedule and how to make the most of your weekly schedule. So, if you’re looking for a way to stay organized and on-top of your responsibilities, this article is for you!
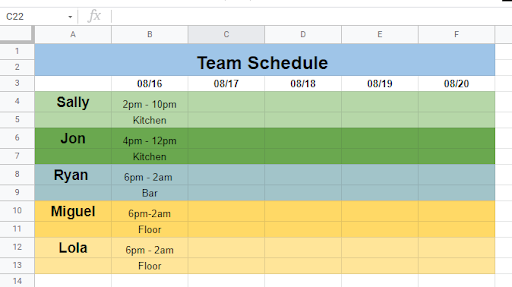
Creating a weekly schedule in Excel is easy! Just follow these simple steps:
- Open a new Excel document and create columns for each day of the week.
- Label each column with the day of the week, starting with Sunday.
- In each row, enter the tasks, events and activities for the day.
- Customize the colors and fonts to add a personal touch.
- Save the document and refer to your weekly schedule regularly.
Creating a Weekly Schedule in Excel
Creating a weekly schedule in Excel can help you keep track of tasks, deadlines, and other important information. It can also be used to organize your personal and professional life. By following the steps outlined below, you can easily create a customized weekly schedule in Excel.
Step 1: Setting Up the Spreadsheet
The first step in creating a weekly schedule in Excel is to set up the spreadsheet. To do this, you will need to open a new Excel document and enter the days of the week into the first row. You can then add additional columns for tasks and activities as well as any other information you need. Once you have set up the spreadsheet, you can save it and begin entering your weekly schedule.
Step 2: Entering Tasks and Activities
The next step in creating a weekly schedule in Excel is to enter your tasks and activities. This can be done by entering the tasks and activities into the appropriate columns of the spreadsheet. If you need to add additional columns, you can do so by clicking on the “Insert” tab and selecting the “Columns” option. You can then enter the tasks and activities into the new columns.
Step 3: Customizing Your Schedule
Once you have entered your tasks and activities into the spreadsheet, you can begin customizing your weekly schedule. This can be done by adjusting the font size, color, and other formatting options. You can also add icons or images to the spreadsheet to make it more visually appealing. Additionally, you can add formulas to the spreadsheet to automatically calculate totals or other information.
Step 4: Saving and Printing Your Schedule
Once you have finished customizing your weekly schedule, you can save it and print it. To save the spreadsheet, click on the “File” tab and select “Save As”. You can then choose a location to save the file and give it a name. To print the schedule, click on the “Print” tab and select the “Print” option.
Step 5: Making Changes to Your Schedule
Finally, if you need to make changes to your weekly schedule, you can do so by simply editing the spreadsheet. You can add new tasks or activities, delete existing ones, or make any other changes that you need. Once you have finished making the changes, you can save the spreadsheet and print the updated schedule.
Tips for Creating a Weekly Schedule in Excel
Set up the Spreadsheet Correctly
When setting up the spreadsheet for your weekly schedule, it is important to make sure that you set it up correctly. This means entering the correct days of the week in the first row and adding any additional columns that you need. It is also important to save the spreadsheet before making any changes.
Be Organized and Consistent
When entering tasks and activities into the spreadsheet, it is important to be organized and consistent. This means that you should enter the tasks and activities in the same location each time. It is also important to use the same font size and color for all entries.
Make Use of Formulas and Icons
When creating a weekly schedule in Excel, it is also important to make use of formulas and icons. Formulas can be used to automatically calculate totals or other information. Icons can be used to make the spreadsheet more visually appealing. Both of these features can make creating and using a weekly schedule in Excel much easier.
Top 6 Frequently Asked Questions
Q1. What is the best way to create a weekly schedule in Excel?
A1. The best way to create a weekly schedule in Excel is to use the in-built ‘timeline’ feature. This feature allows you to quickly and easily create a timeline that displays the days of each week and the hours of each day. You can easily customize the timeline to your desired layout, including setting the start time and end time for each day. Once the timeline is set up, you can enter the tasks and events for each day, and the timeline will automatically adjust to show the tasks and events at the appropriate times.
Q2. How can I enter tasks and events into my weekly schedule?
A2. To enter tasks and events into your weekly schedule, you can use the ‘Data Validation’ feature in Excel. This feature allows you to create a list of tasks or events that you can select from when entering data into your weekly schedule. You can also use the ‘Conditional Formatting’ feature in Excel to highlight tasks or events that are completed or due soon.
Q3. Is there a way to automatically update my weekly schedule?
A3. Yes, you can use the ‘Auto Fill’ feature in Excel to automatically update your weekly schedule. This feature allows you to set a formula or condition that will update the weekly schedule as new tasks and events are added or changed. For example, you can set the formula to automatically add new tasks and events, or to update existing tasks and events with new information.
Q4. How can I share my weekly schedule with others?
A4. You can easily share your weekly schedule with others by using the ‘Share Workbook’ feature in Excel. This feature allows you to invite others to view and edit your weekly schedule, and the changes will be synced across all users. This makes it easy to keep everyone up to date on tasks and events.
Q5. Is there a way to customize my weekly schedule in Excel?
A5. Yes, you can customize your weekly schedule in Excel by using the ‘Format Cells’ feature. This feature allows you to customize the look and feel of your weekly schedule, including changing the font, colors, size, and more. You can also add images, charts, and other elements to your weekly schedule to make it easier to track tasks and events.
Q6. How can I print my weekly schedule?
A6. To print your weekly schedule, you can use the ‘Print’ feature in Excel. This feature allows you to choose the range of cells to print, as well as the page size and orientation. You can also set the margins, header, and footer for your printed weekly schedule. Once you have finished setting the print options, you can click ‘Print’ to print the weekly schedule.
How to Make a Weekly Schedule in Excel – Tutorial
Creating a weekly schedule with Microsoft Excel is a great way to stay organized and get tasks completed on time. With its automated features, Excel can help you quickly and easily create a customized schedule that works for you. With a few simple steps, you can have a schedule up and running in no time. So, if you’re looking for an effective way to stay organized, give Excel a try! You’ll be glad you did!