


How to Set Out of the Office in Outlook?

Are you looking for a quick and easy way to manage your out of office messages in Outlook? With this guide, you can learn how to set out of office messages for yourself and others in Outlook in just a few simple steps. By the end of this guide, you’ll be able to effectively manage your out of office messages and ensure that your contacts always have the most up-to-date information. So, if you’re ready to learn how to set out of office in Outlook, let’s get started!
How to Set Out of the Office in Outlook?
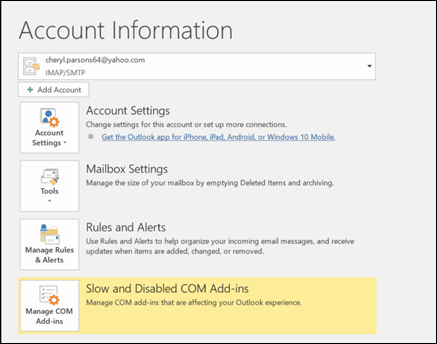
- Open Outlook and click on the File tab.
- Select the Automatic Replies (Out of Office) option.
- Choose the Send Automatic Replies option.
- Set the time period for when you will be out of the office.
- Create the message that will be sent to people while you are away.
- Click the OK button.
How to Set an Out of Office Message in Outlook
Outlook is a powerful email client that is commonly used by businesses and individual users. It allows users to set an out of office message so that all incoming emails are replied to with an automated response. This ensures that emails are not missed while the user is away from the office. In this article, we’ll discuss how to set an out of office message in Outlook.
The first step in setting an out of office message in Outlook is to open the program. Once the program is open, the user should then select the “File” tab from the top menu bar. From the File tab, the user should select the “Automatic Replies” option. This will open the “Automatic Replies” window.
Configuring the Out of Office Settings
The “Automatic Replies” window will have several options that allow the user to configure the out of office message. The user should select the “Send Automatic Replies” option and enter the out of office message in the text box. The user should also select the “Send replies only during this time period” option and enter the dates during which the out of office message will be active. Once the settings have been configured, the user should click the “OK” button to save the changes.
Testing the Out of Office Message
Once the out of office message has been configured, it is important to test it to ensure that it is working correctly. To do this, the user should send an email to their own address and check if the out of office message is sent in response. If the out of office message is sent correctly, then the settings have been configured correctly.
Managing Out of Office Replies
Once the out of office message has been set up, the user can manage how it is used. To do this, the user should select the “File” tab from the top menu bar and then select the “Automatic Replies” option. From the “Automatic Replies” window, the user should select the “Manage Replies” option. This will open the “Manage Replies” window.
Editing the Out of Office Message
The “Manage Replies” window allows the user to edit the out of office message. The user should select the “Edit” option and enter the new out of office message in the text box. Once the message has been edited, the user should click the “OK” button to save the changes.
Deleting the Out of Office Message
The “Manage Replies” window also allows the user to delete the out of office message. To do this, the user should select the “Delete” option and then confirm the deletion by clicking the “OK” button. Once the message has been deleted, the user will no longer receive any out of office messages.
Conclusion
Setting an out of office message in Outlook is a simple process that can be completed within a few minutes. The user should open the program, select the “File” tab from the top menu bar, and then select the “Automatic Replies” option. From the “Automatic Replies” window, the user should select the “Send Automatic Replies” option and enter the out of office message. The user should also select the “Send replies only during this time period” option and enter the dates during which the out of office message will be active. Once the settings have been configured, the user should send a test email to their own address to ensure that the out of office message is working correctly. The user can then manage the out of office message by selecting the “Manage Replies” option from the “Automatic Replies” window.
Top 6 Frequently Asked Questions
What is the Out of Office Setting in Outlook?
The Out of Office setting in Outlook is a feature that allows you to automatically send an email response when someone sends you a message while you are away from the office. This feature can be used to inform contacts that you will not be available to respond to emails during your absence. This can be helpful for letting colleagues, customers, and other contacts know that you are away and when you will be returning.
How Do I Set Out of Office in Outlook?
Setting out of office in Outlook is easy and can be done in a few simple steps. First, open Outlook, and select “File” and then “Automatic Replies”. Then, select “Send Automatic Replies” and choose the times and dates you will be away. Once you have selected the time and date, you can type your message and select “OK” to save the settings.
How Do I Turn Off Out of Office in Outlook?
Turning off the Out of Office setting in Outlook is just as easy as turning it on. Start by opening Outlook and selecting “File” and then “Automatic Replies”. Then, select “Do not send automatic replies”. You will then be prompted to confirm that you want to turn off the out of office setting – select “Yes” to confirm. The out of office setting will then be turned off.
How Do I Change the Out of Office Message in Outlook?
Changing the Out of Office message in Outlook is simple. Start by opening Outlook and selecting “File” and then “Automatic Replies”. Then, select “Send Automatic Replies”. You will then be able to update the message, select the times and dates you will be away, and select “OK” to save the changes.
Can I Set Out of Office in Outlook for Multiple Accounts?
Yes, it is possible to set out of office in Outlook for multiple accounts. First, open Outlook and select “File” and then “Automatic Replies”. Then, select “Send Automatic Replies” and select the account you want to send the out of office message from. Once you have selected the account, you can type your message and select “OK” to save the settings.
Can I Set Different Out of Office Messages for Different Accounts?
Yes, it is possible to set different out of office messages for different accounts. Start by opening Outlook and selecting “File” and then “Automatic Replies”. Then, select “Send Automatic Replies” and select the account you want to send the out of office message from. Once you have selected the account, you can type your message and select “OK” to save the settings. You can then repeat the process for any additional accounts and create different out of office messages for each one.
How to Set Out of Office in Outlook
Setting out of office in Outlook is a great way to make sure that your messages are received by the right people, even when you are away. If you’re looking for a simple and efficient way to make sure that you’re always on top of your emails, setting out of office in Outlook is a great way to do it. By following the simple steps outlined in this article, you’ll be able to make sure that your emails are sent to the right places and that your recipients are always kept up-to-date with your availability. So, what are you waiting for? Get started now and set up your out of office message in Outlook today!