


How To Take A Screenshot On Google Chrome Windows 10?

Taking screenshots on Windows 10 is an essential task for any user. Whether you are sharing information with colleagues or just need to save a visual record of your work, it's important to know how to take a screenshot on Google Chrome Windows 10. In this article, we'll explain how to take a screenshot on Google Chrome Windows 10 in just a few simple steps.
- Open the page you'd like to capture in Google Chrome.
- Press the Windows key + Shift + S. This will open the snipping bar.
- Choose whether you'd like to capture the entire page, or only a portion of it.
- Once you've chosen your selection, the screenshot will be copied to your clipboard.
- Open an image editor, such as Microsoft Paint, and press Ctrl + V to paste the screenshot.
- Save the image and you're done!
How To Do A Screenshot In Chrome?
Taking a screenshot in Chrome is an easy process. To take a screenshot of your current page, you will need to press the following keys on your keyboard: Ctrl + Show windows (or F5). This will capture an image of the entire page, including any content that may be below the fold.
To take a screenshot of a specific area, you can press the Ctrl + Shift + Show windows (or F5). This will allow you to select a specific area of the page to capture. Once you have selected the area, the image will be captured and saved to your clipboard. You can now paste the image into any image editing software to save it.
If you want to take a screenshot of your current page and save it directly to your computer, you can press the Ctrl + Shift + S (or F6). This will open a dialog box where you can enter a name for the file and choose a location to save it. Once you have completed these steps, your screenshot will be saved to your computer in the location you have chosen.
Does Chrome Have A Screenshot Tool?
Yes, Chrome does have a screenshot tool. Chrome gives you the ability to take a screenshot of any web page without needing to use any third-party applications. Taking a screenshot in Chrome is easy and fast, and there are two main ways to do it. The first way is to use the keyboard shortcut which is Ctrl+Shift+Window Switcher Key (F5 on Windows, and F14 on Mac). This shortcut will capture the whole page including parts that may not be visible on the screen.
The second way is to use the "Take Screenshot" option that is available when right-clicking on the page. This will allow you to select the area of the page that you would like to take a screenshot of. Chrome also has a few other options for taking screenshots. You can use the Developer Tools to capture a screenshot of the page, or you can even use the Chrome Extension for taking screenshots. The Chrome Extension for taking screenshots gives you the ability to take a full-page screenshot, or you can select the area of the page that you would like to capture.
The Chrome Extension also allows you to edit the screenshot and save it in various formats such as JPEG, PNG, or PDF. Overall, Chrome is a great browser that offers a lot of features and tools for taking screenshots. The two main ways to take a screenshot are using the keyboard shortcut or the right-click option. You can also use the Developer Tools or the Chrome Extension for taking screenshots.
How Do I Take A Screenshot In Chrome Without A Windows Key?
Taking a screenshot in Chrome without a Windows key is easy. All you need to do is open the Chrome browser, open the web page that you want to take a screenshot of, and press Ctrl+Shift+Windows switch+S on your keyboard. This will open the 'Snipping Tool' window, where you can select the area of the page that you want to capture.
Once you have selected the area, you can then save the screenshot to your computer by clicking the 'Save' button. If you don't have a Windows key, you can also take a screenshot in Chrome using the Print Screen key. To do this, open the Chrome browser, open the web page that you want to take a screenshot of, and press the Print Screen key on your keyboard.
This will capture a screenshot of the entire web page and save it to your computer's clipboard. You can then paste the screenshot into an image editor, such as Paint, and save it to your computer.
Alternatively, you can also take a screenshot of a webpage in Chrome by right-clicking on the webpage and selecting the 'Take a Screenshot' option. This will open a toolbar at the top of the page, where you can select the area of the page that you want to capture. Once you have selected the area, you can then save the screenshot to your computer by clicking the 'Save' button.
How To Take A Screenshot On Windows 10?
Taking a screenshot on Windows 10 is very simple and straightforward. All you need to do is press the Windows Logo and PrtScn (Print Screen) keys at the same time on your keyboard. Your screen will then dim for a second, indicating that the screenshot was taken. The screenshot will be saved in the Pictures > Screenshots folder in your computer.
Alternatively, you can also use the Snipping Tool that comes with Windows 10. To access it, you can type “snipping tool” in the Search bar and click on the application. Once the Snipping Tool is open, you can select the type of snip you want (free-form, rectangular, window, or full-screen) and then select the area you want to capture. After you take the screenshot, it will open in a new window where you can annotate, save, or share your snip.
- Step 1: Press the Windows Logo and PrtScn (Print Screen) keys at the same time on your keyboard.
- Step 2: Your screen will then dim for a second, indicating that the screenshot was taken.
- Step 3: The screenshot will be saved in the Pictures > Screenshots folder in your computer.
- Step 4: Alternatively, open the Snipping Tool by typing “snipping tool” in the Search bar and click on the application.
- Step 5: Select the type of snip you want (free-form, rectangular, window, or full-screen).
- Step 6: Select the area you want to capture.
- Step 7: After you take the screenshot, it will open in a new window where you can annotate, save, or share your snip.
Screenshot On Chrome Extension
Taking a screenshot on Google Chrome Windows 10 is a simple task. You can easily capture a web page or any part of it in just a few clicks. There are two main methods for taking a screenshot on Chrome for Windows.
The first method is the built-in Chrome extension, and the second method is using the Windows Snipping Tool. Using Chrome Extension: - Open the Chrome browser and go to the Chrome Web Store. - Search for the “Screen Capture” extension and add it to your Chrome browser.
Once the extension is added, click on the extension icon on the top right of your Chrome browser. - You will be prompted with three options to capture the webpage: Capture Visible Part of Page, Capture Selected Area, and Capture Entire Page. - Depending on your need, select the appropriate option and the screenshot will be captured and saved in your downloads folder.
Using Windows Snipping Tool: - Open the Windows Snipping Tool by going to Start > All Apps > Windows Accessories > Snipping Tool. - Click on the “New” button and select the part of the screen that you want to capture. - The screenshot will be displayed in the Snipping Tool window. - You can now save the screenshot by going to File > Save As and choosing the location where you want to save the image.
Chrome Screenshot Whole Page
Taking a screenshot in Google Chrome is a quick and easy process. First, open the webpage you want to capture in Chrome. Then press and hold the Ctrl + Show windows keys on your keyboard at the same time. This will capture a screenshot of the entire webpage and save it to your clipboard. You can then paste the screenshot into any application, such as Microsoft Paint or Adobe Photoshop, to save it and edit it.
Alternatively, if you want to save the screenshot without having to paste it into another application, you can press the Ctrl + Show windows + S keys together. This will open the ‘Save full-page screenshot’ window, where you can choose the folder to save the screenshot in and give it a file name. Once you have saved the screenshot, you can open it in any image editing software and make further modifications.
If you want to take a screenshot of just a specific part of the page, you can press the Ctrl + Shift + Show windows keys at the same time. This will open a selection tool that you can drag and resize to select the exact area of the page you want to screenshot. Once you have the selection tool in place, press Enter to capture the screenshot. You can then save it in the same way as described above.
How To Screenshot On Windows
Taking screenshots of what’s happening on your screen can be extremely useful whenever you need to show someone else the exact content you’re seeing. If you’re using Google Chrome on Windows 10, there are several ways to take screenshots without the need of third-party apps.
The most common way to take a screenshot is by using the Windows 10’s built-in Snipping tool. This can be accessed by going to the Start menu, then selecting the “Snipping Tool”. Once opened, simply press the “New” button to start taking a screenshot.
You can then drag the cursor to select the area you want to capture. You can also delay the screenshot for up to 5 seconds by clicking the down arrow near the “New” button. Once done, click “Save As” to save the screenshot to your computer. Another way to take a screenshot is by using the “Print Screen” button. To do this, you can press the “Print Screen” button on your keyboard and the screenshot will be taken. The screenshot is automatically copied to the clipboard and you can paste it to any image editor or document to save it.
Lastly, you can also take a screenshot directly from Chrome. All you need to do is right-click anywhere on the page and select “Capture screenshot”. The screenshot will be automatically saved to your computer. With these simple steps, you can easily take screenshots of your Google Chrome page on Windows 10.
Screen Capture
Taking a screenshot on Google Chrome for Windows 10 is a quick and easy process. First, open the page you want to capture in Chrome. You can then press the "PrtScn" key on your keyboard. This will capture a screenshot of your entire desktop. If you want to capture only the Chrome window, you can press the “Alt” and “PrtScn” keys at the same time. This will capture only the active window, without including any other windows. You can also take a screenshot using the Chrome browser itself.
To do this, simply right-click anywhere on the page and select “Take a screenshot” from the menu. This will open a small window with a few options. You can choose to capture the visible area, the entire page, or only a specific region. Once you have chosen the area you want to capture, click the “Save” button to save your screenshot.
Finally, if you want to edit or annotate your screenshot, you can use an image editor like Paint or Photoshop. With these tools, you can crop, rotate, add text, and apply other edits to your screenshot.
How To Screenshot On Chromebook Without Windows
Taking a screenshot on a Chromebook without Windows 10 is easy and can be done in a few simple steps. To start, open the Chrome browser and open the page or image you’d like to capture. To capture the entire screen, press the “Ctrl” and “Window Switch” keys at the same time.
To capture a portion of the screen, press “Ctrl” and “Shift” at the same time, and then select with your mouse the area you’d like to capture. To save the screenshot, press the “Ctrl” and “Window Switch” keys at the same time again. This will open the “Save As” window, where you can choose a destination and name for the file.
When you’re done, click “Save” and the screenshot will be saved. The screenshot will be saved as a PNG file in the Downloads folder. You can then move the file to a different location or share it with others.
Best Chrome Screenshot Extension
When it comes to taking screenshots in Google Chrome on a Windows 10 device, there are several options available. The most popular and user-friendly of these options is the use of an extension. Extensions are primarily used to enhance the browsing experience, but they can also be used for capturing screenshots.
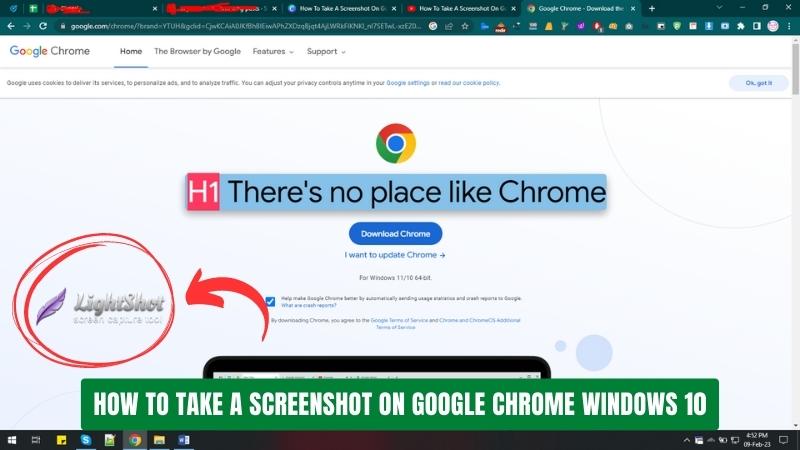
The best Chrome screenshot extension for Windows 10 is Lightshot. Lightshot is an incredibly simple and efficient extension to use. It is free to install from the Chrome Web Store and has a simple user interface.
Once installed, users can access Lightshot from the Chrome menu or by pressing the Print Screen key on their keyboard. Lightshot will then open a small window with various options, such as the ability to capture a full page or just a portion of the screen. It also has options to save the screenshot to a file, share it on social media, or even upload it to the cloud.
Overall, Lightshot is an excellent choice for taking screenshots in Google Chrome on a Windows 10 device. It is free, easy to use, and provides a variety of options for capturing, saving, and sharing screenshots.
How To Screenshot On Chromebook Hp
Taking a screenshot of your Chromebook display is easy. In this guide, you'll learn how to take screenshots on HP Chromebooks running Chrome OS. To capture the entire screen, press the Ctrl + Show windows keys at the same time. Your screen will dim briefly, indicating that a screenshot has been taken.
The screenshot will be saved in your Downloads folder. You can also take screenshots of just a portion of the screen. To do this, press the Ctrl + Shift + Show windows keys. Your cursor will turn into a crosshair. Click and drag the crosshair to select the area you want to capture. When you’re done, release the mouse button.
The screenshot will be saved in your Downloads folder. If you want to take a screenshot of an individual window, press the Ctrl + Alt + Show windows keys. Your mouse cursor will turn into a crosshair. Click on the window you want to capture. The screenshot will be saved in your Downloads folder.
How To Take A Screenshot On A School Chromebook
Taking a screenshot on a school Chromebook is a quick and easy task that can be done in several different ways. Depending on the version of Chrome OS you are running, the process may be slightly different. To take a screenshot with the keyboard, press the ‘Ctrl’ and ‘Window Switch’ keys simultaneously.
This will take a screenshot of your entire screen and save it to your ‘Downloads’ folder. You can also take a screenshot of a specific area of your screen by pressing the ‘Ctrl’, ‘Shift’, and ‘Window Switch’ keys simultaneously. This will allow you to select the area you want to capture. If you don’t have a keyboard, you can still take a screenshot using the Chromebook’s built-in tools. To access these tools, click the ‘Apps Launcher’ icon and open the ‘Files’ app (it looks like a folder).
From there, click the ‘More Actions’ button and select the ‘Take Screenshot’ option. This will allow you to capture the entire screen or a specific area. Once you’ve taken your screenshot, you can edit it using the ‘Image Editor’ app. This app allows you to crop, rotate, and add text to your image. You can also save it as a different file type or share it with others.
How to Easily Take a FULL PAGE Screenshot on Google Chrome
Taking a screenshot of your web page or any other content on Google Chrome is easy and efficient. With the simple steps outlined above, you can easily capture any image or text you want to save on your computer. Not only is it useful for archiving information, but it is also helpful for creating tutorials, presentations, and other documents. Taking a screenshot on Google Chrome Windows 10 is a quick and easy way to capture any information you need from the web.