


Using Windows 10 and Windows 11

Using Windows 10
This Article covers the basics of the Windows 10 user interface. We look at all the things that you tap, click, drag, and drop in order to make Windows do what you want it to do. If you’re just arriving in Windows 10 after spending months or years with Windows 7, you’ll find both familiarity and novelty here. But even if you’ve been happily and productively working with Windows 10 since the operating system debuted in July 2015, you might want to give this chapter a quick perusal. Microsoft now provides semiannual updates to Windows, continually introducing new features and enhancing existing ones.
The interface has “matured” over these last several years —that is to say, changed in subtle and significant ways for the better. It’s worth getting reacquainted to see what’s new.
A quick disclaimer: In this article and throughout, we write and depict the operating system as it stood in mid2020. Version 2004 is the basis for this book, but by the time you read this, you may be looking at a later version.
(To see which version you’re using, look under Windows Specifications at Settings > System > About.) It’s possible that some of the screenshots and step-by-step instructions you find in this book may not match exactly the system you’re working with. We hope that our descriptions are clear enough that you’ll be able to take those small changes in stride.
AN OVERVIEW OF THE WINDOWS 10 USER EXPERIENCE
Before we dive into detailed descriptions of individual features, please join us for a brief tour of Windows 10.
Our goal is to introduce the different parts of Windows, new and old, so that we can be sure you’re on the same page…or at least looking at the same arrangement of pixels.
Figure 3-1 shows the basic building blocks of Windows 10 and offers a hint of its signature visual style.
Figure 3-1 Start and Action Center are at the core of the Windows 10 experience, with the familiar desktop front and center for conventional PCs.
When you first start up a PC running Windows 10, you see the familiar Windows 7–style desktop and taskbar.
Clicking the Start button—the Windows logo in the lower-left corner—opens Start, which is conceptually similar to its predecessor but differs dramatically in the details.
A click on the right side of the taskbar opens Action Center, which is also shown in Figure 3-1. This pane, which uses the full height of your display, contains notifications from apps and services as well as action buttons that allow quick access to settings.
As with previous versions, Windows 10 offers multiple ways to switch between tasks. The Task View button, located at the left end of the taskbar, produces the view shown in Figure 3-2, which also shows a portion of Timeline. We discuss Task View and Timeline in more detail later in this article.
Figure 3-2 Use Task View to switch quickly between available windows; or use the Timeline feature to switch to activities or sites from the immediate or more distant past.
USING AND CUSTOMIZING THE WINDOWS 10 START MENU
Touchscreens might represent the future of computing, but the present is still ruled by more-or-less conventional desktop and laptop PCs, each equipped with a keyboard and a mouse or touchpad. For that type of device, the desktop is where you’ll likely spend most of your time, and it’s what we concentrate on in this section.
Using and customizing Start
The interface element popularly known as the Start menu is officially called Start in Windows 10, although you’ll find references to both terms scattered throughout Windows 10 and its online help files. You open Start by clicking the Windows icon at the far-left end of the taskbar or pressing the Windows key. Start is divided into three segments. At the very left is a thin column, near the bottom of which appear the current user’s name and picture and icons for the Documents and Pictures folders, as well as for Settings and Power. You can display descriptive labels alongside each of those icons by hovering the mouse pointer anywhere within this column.
Next to the thin column is a wider column that includes a list of any recently added apps, the apps you use most often, and a scrolling list of all your apps. In the app list, you’ll find the names and icons for your programs, listed in alphabetical order. You can move through the list by swiping directly on a touchscreen, using two-finger scrolling gestures on a touchpad, or using the scroll wheel with a mouse. Often the quickest way to get from one part of the list to another is by clicking any of the letter headings. That produces an index menu, like this:
You can click or tap any letter or symbol in this menu to jump to the associated part of the all-apps list.
Obviously, you can launch any item in the app list by tapping or clicking it. Alternatively, if you’re comfortable typing, you can skip all the scrolling, tap the Windows key to position the insertion point in the search box, and then begin typing the name of an item you want in the search box, directly to the right of the Start button.
(Refer to Figure 3-1.) What you’re looking for will soon appear at or near the top of the search results. This approach is especially handy when you’re not sure exactly where in the app list the item you desire is located. (Where’s Notepad, for example? Its default location is within the Windows Accessories folder, several clicks or taps away from the top of the list. You’ll get to it more quickly by typing.)
The remainder of Start consists of tiles. This is the remnant of the Start screen that filled the desktop in Windows 8. As in Windows 8, tiles can be live or not. The live ones update their appearance periodically with relevant content. Windows gives you some tiles to get you going (including some that you might want to get rid of), but, of course, this part of Start is completely customizable, as we discuss shortly.
You can change the size and shape of Start by dragging it up (to a maximum height that is 100 pixels below the top of the display), to the right, or both ways.
Customizing the contents of Start
If you’re accustomed to the extensive array of customization options for items on the Start menu in earlier Windows versions, you’ll need to make some adjustments. You can remove programs from the Most Used section, but you can’t pin program shortcuts to the left side of Start.
You can, however, add or remove certain folder shortcuts from the narrow column of options at the left edge of Start. The Documents and Pictures folders are there by default, but you can put various others there as well. You might want to have File Explorer or Network accessible on the narrow strip, for example. To see the list of possibilities, go to Settings > Personalization > Start, and then click or tap Choose Which Folders Appear On Start.
What if you actually prefer the visual style of Windows 8.1 and would rather work only with tiles instead of program names? To express this preference, visit Settings > Personalization > Start, and turn Show App List In Start Menu to Off. To emulate the look of Windows 8.1 more closely, turn on Use Start Full Screen. Windows 10 will respond by spreading your Start tiles across the full expanse of your screen.
If you choose to hide the alphabetical app list, you can easily redisplay it when you need it. With the app list absent, Windows adds two new buttons, called Pinned Tiles and All Apps, near the top of the narrow strip at the left of Start. Clicking All Apps produces a display comparable to the one shown in the following illustration. Clicking Pinned Tiles then restores the visual style of Windows 8.1:
Adding and arranging tiles
Clicking a tile has the same effect as clicking a program shortcut on the Start menu’s apps list or a pinned taskbar button. What makes tiles different is the variety of sizes and their ability to display information or notifications from the app, making a tile live.
To pin a program as a tile to the right side of Start, drag it from the app list or the Most Used list on the left side of Start into position. As an alternative, right-click its entry in the app list or the Most Used list on the left side of Start, and then click or tap Pin To Start. The item will take up residence as a medium-sized tile in the first available empty space, and from there you can move and resize it as needed.
To remove a program from the right side of Start, rightclick it and then click Unpin From Start.
You can adjust the size of any tile by right-clicking the tile to see the menu shown in Figure 3-3.
Figure 3-3 These options are available for most modern apps, including those you acquire from the Microsoft Store. Not all apps support this full list of sizes.
A slim bar sits above every group of tiles. Click (as we have in Figure 3-4) to display a text box where you can type a group name of your choosing. (We created a group named Useful Accessories.) Click the horizontal lines to the right of the name box to drag the entire group to a new location.
Figure 3-4 Click above any group of tiles to give that group a descriptive label.
Gathering tiles into folders
Another technique for grouping tiles is to create a folder. A folder of tiles looks like an ordinary tile with small icons inside, representing the contents of the folder. The following is a folder of Microsoft Office apps: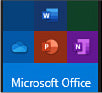
When you click or tap a folder, the folder opens to reveal the individual tiles contained within, like this:
With the folder thus expanded, you can launch any of the apps it contains in the usual way, or return the folder to its former state by clicking the upward arrow.
To create a folder, drag one tile and drop it on top of another. To drop additional apps into the folder, drag them to the existing folder. To remove an app from a folder while leaving it available on the Start menu, expand the folder and then drag the app to the place where you want it to appear.
USING AND CUSTOMIZING THE TASKBAR
The taskbar is that strip of real estate along one screen edge (the bottom by default) whose initial arrangement contains, from left to right, the Start button, the search box, Talk To Cortana, the Task View button, program buttons, notification icons, a clock, and the Action Center button. The taskbar made its first appearance in Windows 95. In the years since, it has slowly evolved without changing its basic shape.
The Windows 10 taskbar continues to serve the same functions as its predecessors—launching programs, switching between programs, and providing notifications —with only subtle changes in functionality.
Every running program with a user interface has a corresponding taskbar button. When you close that program, the button vanishes as well, unless you pinned it to the taskbar. A faint line appears underneath the icon for a running program, and the program with the current focus has a subtle but noticeable transparent shadow to identify it. Figure 3-5 shows the first group of options on that Settings page.
Figure 3-5 For most people, the options set here will be acceptable, especially Lock The Taskbar, which prevents you from accidentally dragging the taskbar to the side of the monitor.
The following is a rundown of the options shown in Figure 3-5:
- Lock The Taskbar On by default, this option prevents you from accidentally dragging the taskbar to the side or top of the desktop. Note that the shortcut menu that appears when you right-click the taskbar also includes this command. It’s there so that you can easily switch in and out of the locked mode when you need to adjust the size or position of the taskbar. Also note that locking the taskbar does not prevent you from rearranging taskbar icons. (If your Windows configuration includes multiple monitors, this command changes to Lock All Taskbars.)
- Automatically Hide The Taskbar By default, the taskbar remains visible at all times. If that’s inconvenient for any reason, you can tell it to get out of the way. The Settings page provides separate Hide options for Desktop and Tablet modes. With either option set, the taskbar retreats into the edge of the desktop whenever a window has the focus. To display the hidden taskbar, move the mouse pointer to the edge of the desktop where the taskbar normally resides. On a touchscreen, swipe from that edge toward the center of the screen.
- Use Small Taskbar Buttons Select this option if you want to reduce the height of taskbar buttons, making them similar in size to buttons in earlier Windows versions. In our experience, buttons of this size are too small for practical use. If you have the eyesight of a hawk, your opinion might differ.
- Use Peek To Preview The Desktop With this option on, moving your mouse to the extreme right edge (or bottom, if you have the taskbar on the left or right side of the screen) of the taskbar (beyond the Action Center button) hides all open windows temporarily, giving you the opportunity to see the underlying desktop. This option is off by default; we don’t see a good reason not to turn it on (and Figure 3-5 shows the option set to on).
- Replace Command Prompt With Windows PowerShell Leave this option on if you’re a PowerShell user. You’ll save some steps getting to the command line.
- Show Badges On Taskbar Buttons Badges are small circular notifications that can appear on the lower-right corner of certain taskbar buttons. In the following illustration, for example, badges on the Alarms & Clock, Weather, and Mail buttons indicate that an alarm has been set, that a weather alert is in effect, and that a stack of mail is waiting to be read.

- Taskbar Location On Screen The taskbar appears at the bottom of the screen by default. As you would expect, the alternatives are top, left, and right. You don’t have to visit Settings to change positions, however. Simply unlock the taskbar and drag it.
- Combine Taskbar Buttons The default setting for Combine Taskbar Buttons is Always, Hide Labels. This setting instructs Windows to always group multiple windows from a single application (such as Microsoft Word documents) into a single taskbar button. The Hide Labels setting for this option ensures that each running program has one and only one button, which consists of the program’s icon. With either of the other settings (When Taskbar Is Full or Never), Windows gives each window its own separate taskbar button and adds the name of the running program or open document as a label to the right of the program icon, if space permits. It groups windows only when the taskbar becomes too crowded or continues to shrink the size of taskbar buttons as you open more windows. We recommend the default setting here.
Pinning programs to the taskbar
Pinning a taskbar button makes it easy to find and run favorite programs without the need to open Start or use the search box to find the program’s shortcut. To pin a program to the taskbar, simply drag its icon or a shortcut (from Start, from the desktop, or from any other folder) to the taskbar. Alternatively, right-click a program icon wherever you find it or the taskbar button for a running program and then click Pin To Taskbar.
To remove a pinned program from the taskbar, rightclick the pinned icon and then click Unpin From Taskbar. This command also appears on other shortcuts to the program, including those on the desktop and on Start.
You can use taskbar buttons to launch a program that’s not currently running or to switch from one running program to another. You can also click a taskbar button to minimize an open window or to restore a minimized window. If those features sound too obvious, here’s a trick you might not know: You can open a new instance of a program that’s already running—a new Microsoft Word document, for example, or a fresh File Explorer window—by right-clicking the taskbar button and then clicking the program name; alternatively, hold Shift and click the program’s taskbar button.
Using Jump Lists for quick access to documents and folders A Jump List is the official name of the additional menu options that appear when you right-click a taskbar button or a tile pinned to Start for a program that supports this feature.
Jump Lists can include shortcuts to common tasks that can be performed with that program, such as New Window or New InPrivate Window on a Microsoft Edge Jump List. For Microsoft Office programs, Adobe Acrobat, and other similarly document-centric programs, Jump Lists also typically include links to recently opened files as well as pinned shortcuts to files and folders.
Figure 3-6 shows the default Jump List for File Explorer.
Figure 3-6 Right-click a taskbar button, such as File Explorer, to see a Jump List showing recently opened files and folders with the option to pin items for quick access.
Individual files and folders can’t be pinned directly to the taskbar, but you can add them to Jump Lists by using the following techniques:
- To pin a document to the taskbar, drag its icon or a shortcut to any empty space on the taskbar. If the taskbar already has a button for the program associated with the document, Windows adds the document to the Pinned section of the program’s Jump List. If the document’s program is not on the taskbar, Windows pins the program to the taskbar and adds the document to the program’s Jump List.
- To pin a folder to the taskbar, drag its icon or a shortcut to the taskbar. If the folder is already in the Frequent list for File Explorer, point to its entry and click the pushpin icon. Windows adds the folder to the Pinned section of the Jump List for File Explorer.
- To open a pinned document or folder, right-click the taskbar button and then click the name of the document or folder.
- To remove a pinned document or folder from the Jump List, rightclick the taskbar button and point to the name of the document or folder to be removed. Click the pushpin icon that appears.
Changing the order of taskbar buttons
To change the order of buttons on the taskbar, drag them into position. Pinned program icons retain their order between sessions, allowing you to quickly find your most used programs in their familiar (to you) location.
Pinning people to the taskbar
The feature described in this section is no longer being developed as of Windows 10 version 1909, and Microsoft says “it may be removed in a future update.”
To simplify communication with your most important contacts, you can pin them to the area at the right side of your taskbar (in the typical left-to-right taskbar orientation), just to the left of the notification area.
Windows displays a thumbnail image for a pinned person if such an image is available or initials if not. The resulting icon can serve as a drop target for a sharing operation (drag a document to a people icon and share options appear), or you can click an icon to review recent communication, see upcoming events for the selected contact, or initiate new communication.
Before you can pin people to the taskbar, you have to ensure that this feature is enabled. Near the bottom of the page at Settings > Personalization > Taskbar, you’ll find a switch labeled Show Contacts On The Taskbar. Set this switch to On.
With contact pinning enabled, a People icon appears near the notification area of the taskbar. Click here, and then choose Find And Pin Contacts.
Windows displays a list of suggested contacts. To pin one of those, click it. To locate contacts not on the suggested list, click Find And Pin Contacts.
Pinned contacts appear just to the left of the People icon:
Note that if you use Focus Assist to squelch calls and notifications during particular hours of the day, any contacts you have pinned to the taskbar are automatically set as priority contacts whose notifications are cleared for display even when you’ve suppressed other notifications.
By default, you can pin up to three contacts on the taskbar. Windows will accommodate as many as ten, however. To allow for more than three, go to Settings > Personalization > Taskbar and change the number under Choose How Many Contacts To Show. Because adding a lot of contacts to the taskbar might crowd out your application icons, Windows provides an overflow area at the top of the pane that appears when you click the People icon. In this illustration, there are three people in the overflow area:
You can put as many people as you want in the overflow area, where they function exactly as they would on the taskbar.
To change the order in which taskbar contacts appear, drag the contact icon to the preferred position and drop it. You can also drag and drop to move a contact from the overflow area to the taskbar. Display the overflow area, grab the contact you want, and drag it to the taskbar. Windows moves one of the current taskbar occupants to the overflow area when you do this. To move an existing taskbar resident to the overflow area, drag it laterally. When your mouse reaches the People icon, the People pane appears, and you can deposit the contact in the overflow area. Windows responds by moving someone from the overflow area to the taskbar.
To remove a pinned contact, right-click it and choose Unpin From Taskbar.
Changing the taskbarʼs size and appearance
The default height of the taskbar is enough to display one button. (If you switch to small buttons, the taskbar automatically shrinks its height to fit.) You can enlarge it —and given the typical size and resolution of computer displays these days, enlarging it is often a great idea. Before you can change the taskbar’s dimensions, you need to unlock it. Right-click an unoccupied area of the taskbar; if a check mark appears next to the Lock The Taskbar command, click the command to clear the check mark. Then position the mouse along the border of the taskbar farthest from the edge of the screen. When the mouse pointer becomes a two-headed arrow, drag toward the center of the screen to expand the taskbar. Drag the same border in the opposite direction to restore the original size. After completing this sequence, be sure to lock the taskbar again!
Moving the taskbar
The taskbar docks by default at the bottom of the screen, but you can move it to any other edge. You do this by selecting the Taskbar Location On Screen option in Settings > Personalization > Taskbar.
As an alternative, you can manipulate the taskbar directly. Unlock the taskbar, and then drag any unoccupied part of it in the direction you want to go. (Don’t drag the edge of the taskbar closest to the center of the screen; doing that changes the taskbar’s size, not its position.)
Adding toolbars to the taskbar
A seldom-used feature of the taskbar is its ability to host other toolbars. Optional toolbars date back to much older versions of Windows, offering shortcuts to folders, documents, and applications. Third parties can also write add-ons that operate entirely within the confines of the taskbar. Built-in toolbars you can choose to install include the following:
- Address The Address toolbar provides a place where you can type an internet address or the name and path of a program, document, or folder. When you press Enter or click the Go button, Windows takes you to the internet address, starts the program, opens the document, or displays the folder in a File Explorer window. The Address toolbar is functionally equivalent to the Run command in Start or the address bar in File Explorer or the Microsoft Edge browser.
- Links The Links toolbar provides shortcuts to internet sites; its contents are drawn from the Favorites Bar in Internet Explorer.
- Desktop The Desktop toolbar provides access to all the icons currently displayed on your desktop. In addition, it includes links to your Libraries, This PC, Network, Control Panel, and other user profile folders. When you click the toolbar’s double arrow, a cascading menu of all the folders and files on your system appears.
To install a new toolbar or remove one you’re currently using, right-click any unoccupied part of the taskbar or any existing toolbar. Click Toolbars on the menu that appears, and then choose from the ensuing submenu. A check mark beside a toolbar’s name means that it’s already displayed on the taskbar. Clicking a selected toolbar name removes that toolbar.
In addition, any folder on your system can become a toolbar. To create a new toolbar, right-click an existing toolbar or a spot on the taskbar, click Toolbars, and then click New Toolbar. In the next dialog box, navigate to a folder and click Select Folder.
The folder’s name becomes the name of the new toolbar, and each item within the folder becomes a tool.
Configuring the taskbar with multiple displays
If your computer has more than one monitor attached, you have additional options: You can show the taskbar on just the main display or on all displays, and you can vary its appearance on each display. To review these options, right-click the taskbar and choose Taskbar Settings. The following illustration shows the multipledisplay options. You’ll find them near the bottom of the page at Settings > Personalization > Taskbar.
Selecting the first option shows a taskbar on each monitor. If you set it to Off, the taskbar appears only on the main display. (You specify the “main display” in Settings > System > Display.
The Show Taskbar Buttons On setting determines where the taskbar button for a particular app appears—on all taskbars or only the one where that app’s window resides.
The last setting specifies how taskbar buttons are combined on displays other than the main display.
Customizing the notification area
The notification area extends from the right edge of your taskbar (on a left-to-right arrangement) to the People area and application tiles. Typically, this includes the Action Center icon, the clock, and a variety of system and application-specific items.
To customize the system icons, go to Settings > Personalization > Taskbar. Under the Notification Area heading, click Turn System Icons On Or Off to specify which icons appear. As Figure 3-7 shows, the available items are denoted by icons and switches.
Figure 3-7 Each notification area icon shown here is currently turned on. With a flick of the switch, you can remove any that you don’t need or want.
To customize the rest of your notification area, click Select Which Icons Appear On The Taskbar. You’ll probably see a longer list, including some items specific to applications or devices on your system. Figure 3-8 shows an example.
Figure 3-8 Some icons in this list provide status messages. Others are shortcuts to associated programs.
You can use the On-Off switches to add or remove items. In case you want them all, Windows provides a main switch at the top of the list.
USING AND CUSTOMIZING ACTION CENTER
Action Center is the formal name of the pane that appears at the right side of your screen when you swipe in from the right (on a touchscreen), press Windows key+A, or click the small button just to the right of the clock on your taskbar. It serves two important functions. First, it supplies a notification area that can display messages from various apps and system components. These notifications occupy the upper part of Action Center. Second, it provides a panel of Quick Action buttons for such things as switching in and out of Airplane Mode or Tablet Mode, projecting your screen to an external display, connecting to a Wi-Fi access point, and so on.
The action buttons appear as one or more rows of tiles along the lower edge of Action Center. Figure 3-9 shows an example of Action Center with two notifications and four rows of Quick Action buttons. (Actually, there are five rows, if you count the Brightness slider below the tiles. This slider replaces the Brightness tile that appeared in earlier versions of Windows.) Notifications are grouped under headings corresponding to the notifying applications. The small arrow to the right of each notification lets you collapse or expand the notification; these are handy if your Action Center is teeming with messages.
Figure 3-9 Action Center consists of two parts: a set of notifications at the top and one or more rows of Quick Action buttons at the bottom.
You can respond to notifications in various ways. If you hover the mouse pointer over a notification, a Close button appears in its upper-right corner, and you can dismiss the notification by clicking there. Click the gear icon to fine-tune or turn off all notifications for that app.
If you click on the body of the notification, the relevant action occurs. For example, clicking on a news bulletin opens the story in the News app; clicking on a message from Windows Update telling you that a system restart is pending might open a secondary message with more details and a button for effecting an immediate restart.
Some Quick Action buttons are simple commands. Clicking All Settings, for example, opens Settings. Others, such as Tablet Mode and Wi-Fi, are toggle switches. Action Center uses the current accent color to indicate which switches are currently on.
Customizing the Quick Actions panel
To edit the contents of the Quick Actions panel, open Action Center, right-click any Quick Action tile that is available and not grayed out, and choose Edit Quick Actions. The panel reappears, festooned with push pins.
You can change the order in which your Quick Actions are displayed by dragging with the mouse or other pointer. On a touchscreen, press and hold a button to select it, and then drag. Note that you do not have to have an empty space in the panel to do the rearranging; Windows adjusts button positions as you drag.
To remove a Quick Action item, click its pushpin. To add an item, click Add. Windows then displays a menu of available items.
The arrangement of the Quick Actions panel matters in one way. With the Collapse button that appears directly above the panel in Action Center (shown in Figure 3-9), you can reduce the panel to a single row of four. The row that appears then is the top row of your current layout. Think of this row as the quickest of your Quick Actions. If you want to get in and out of Airplane Mode effortlessly, for example, you can put that button in the top row, collapse the panel in Action Center, and then swipe in from the right when you board the plane. Your Airplane Mode Quick Action button will be right there, more or less under your thumb.
Customizing notifications
The options for controlling which “senders” can deliver messages to the notification area of Action Center are also located at Settings > System > Notifications & Actions, just below those for Quick Actions. Switches here also control whether messages are displayed on your lock screen. The following illustration shows the options governing general notification behavior.
If your eagle eye has wandered into this corner of Settings in an earlier version of Windows 10, you might notice a few changes. The main switch, Get Notifications From Apps And Other Senders, now appears above the other options, which is appropriate given that it controls the operation of every switch beneath it. And the option list itself is slightly expanded. Here, for example, you now have the choice of denying notifications the ability to play sounds.
The Focus Assist Settings link is a reminder that you can squelch notifications at particular times of day.
Scroll down from these general switches, and you’ll come to switches for individual senders. You can use the switches to deny or allow notifications from particular senders. Clicking on the sender takes you to a more granular set of controls, such as the ones for the Calendar app, shown next:
You can use this set of controls for such things as determining whether a sender provides a notification banner (a pop-up that appears briefly when a notification arrives), whether a sound is played, the maximum number of notifications that will be displayed at one time in Action Center (you can use an Expand button to see the remainder), and the priority given to the sender’s notifications. For example, if you want your Calendar notifications always to show up at the top of Action Center, you can select Top.
SWITCHING TASKS
As in previous Windows versions, you can switch to a different program by clicking its taskbar button. And if you’re not sure which icon your document is hidden under, hover the mouse pointer over a taskbar button to display a thumbnail image of the window above the button. If a taskbar button combines more than one window (representing multiple Microsoft Excel spreadsheets, for example), hovering the mouse pointer over the taskbar button displays a preview of each window.
If the live thumbnail isn’t enough to help you select the correct window, hover the mouse pointer over one of the preview images. Windows brings that window to the forefront, temporarily masking out the contents of all other open windows.
The alternative to this manual hunt-and-click technique is Task View, which displays large, live thumbnails of running programs on the screen so that you can switch with confidence.
To begin, click the Task View button or use the Windows key+Tab shortcut. On a touchscreen-equipped device, you can swipe in from the left edge. Figure 3-10 shows the results on a system with nine running programs.
Figure 3-10 Opening Task View shows running programs using their windowed dimensions. Clicking or tapping any thumbnail opens it in its current position.
Those thumbnails remain open until you do something, usually by clicking or tapping a thumbnail to switch to that window or by pressing Esc to return to the current window.
If there are too many open windows to fit as thumbnails on the display, use the up and down arrows at the bottom of the screen to scroll through the full list.
The old-fashioned Alt+Tab task switcher, familiar to every Windows user of a certain age, is still available as well. The concept is similar, but the thumbnails appear only as long as you continue to hold down the Alt key. Hold down Alt and tap the Tab key to cycle (left to right, top to bottom) through all open windows. When you’ve highlighted the window you want to bring to the fore, release the Alt and Tab keys.
When using Task View, you also have the option of closing a window by clicking the red X in the upper-right corner of the preview or, if your mouse scroll wheel supports clicking, by middle-clicking anywhere in the preview image. Other basic window tasks are available on the shortcut menu that appears when you right-click the preview image.
REVIEWING, REVISITING, RESUMING WITH TIMELINE
The Timeline feature, introduced in version 1803, extends Task View into the past, showing thumbnails for the places you have been and the things you have done within the most recent 30 days. If you forget where you found that important article on the Internet, or if you saved your notes somewhere (but who knows where?), relax; Windows knows. Press Windows key+Tab or click the Task View button. Then scroll down below the thumbnails for your current apps to get to your timeline. Figure 3-11 shows the beginning two days of a user’s timeline.
Figure 3-11 Each tile in Timeline represents an activity or site to which you can return. Initially, two rows of tiles appear for each day heading; you can click links beside the headings to see more.
Each tile represents the combination of an app, a piece of content, and a specific time. Clicking a tile takes you back to the activity in question.
Timeline initially displays two rows of tiles per day, and it selects the activities that it considers to be most “relevant.” If you don’t find what you’re looking for, click the link beside the head to display all activities for the selected day. When you do this, Timeline divides the full day’s activities into hourly subgroups. If you’re still not finding what you need, press Ctrl+F to get to the search box in the upper-right corner of the display.
The scrollbar at the right side of the display is annotated by date. If you want to rediscover what you were up to on a particular day, drag the annotated scrollbar until that date appears.
What if you don’t want to be reminded of certain activities or don’t want others to see what you’ve been doing? You can remove any tile by right-clicking it and choosing Remove. Or you can suppress an entire day’s (or hour’s if you have expanded a day) history by rightclicking a tile and choosing the command at the bottom of the context menu (Clear All From Earlier Today, for example). Timeline also ignores any Microsoft Edge browsing you do in an InPrivate session.
Timeline is a good example of a feature that is evolving as this book goes to press and one that can be expected to undergo more changes in the future. Timeline currently supports Microsoft Edge (and any Progressive Web Apps installed from Edge or from the Microsoft Store), the document-oriented components of Microsoft Office (Word and Excel, for example, but not Outlook), Photos, News, Notepad, Maps, and Microsoft Solitaire Collection. Third-party programs like Adobe Acrobat DC and VLC Media Player also support Timeline. You can expect to see support added for other apps as time passes.
One of the most useful things about Timeline is its ability to track activities across all systems that share a common Microsoft account. If you leave the office in medias res, you can pick up where you left off on another device in another location.
On first use, when you scroll to the bottom of Timeline’s array of tiles, you might encounter the message shown in the next illustration:
Clicking Turn On in this dialog box enables the syncing of Timeline data across devices and, at the same time, extends Timeline’s reach from four days to thirty.
Settings for Timeline are located at Settings > Privacy > Activity History:
With the first and second check boxes selected, Timeline is enabled, and your sites and activities can be revisited on any device sharing a common Microsoft account. (For details about what information Microsoft collects if those first two check boxes are selected, click the Learn More and Privacy Statement links at the right side of the Privacy page. You can opt out of sending your data to Microsoft, but doing so means the events in your Timeline won’t sync to other devices where you’re signed in with that account.) If you open an activity requiring a modern app on a device where that app is not installed, Windows will assist you to install it.
In the Show Activities From Accounts section of the page, you can enable or disable tracking for particular Microsoft accounts, in the event that you have multiple— a work account and a school account, for example. Finally, the Clear button at the bottom of the page provides a way to erase your current history and start fresh.
SWITCHING BETWEEN VIRTUAL DESKTOPS
The idea of virtual desktops is straightforward: Instead of just a single desktop, you create a second, third, fourth, and so on. On each desktop, you arrange
individual programs or combinations of apps you want to use for a specific task. Then, when it’s time to tackle one of those tasks, you switch to the virtual desktop and get right to work.
To create a desktop, click New Desktop at the top of the Task View window.
Virtual desktops show up as a row of thumbnails along the top of the Task View window, like this:
The system depicted here has three virtual desktops. Windows draws a bright border to indicate which desktop is active, and it dims the others. A New Desktop thumbnail makes it easy to expand the layout. You can switch from one virtual desktop to another by clicking its thumbnail. You’ll notice that your taskbar changes to reflect the makeup of the current desktop. To close an existing virtual desktop, select its name and click the Close button that appears. If any windows are open on the desktop you are closing, they will be transferred to the preceding desktop—from Desktop 3 to Desktop 2, for example.
A feature much in demand since virtual desktops were introduced is the ability to give descriptive names to desktops. That feature has been delivered in version 2004. To change the default name—for example, from Desktop 2 to Distractions—right-click the thumbnail and choose Rename.
MANAGING AND ARRANGING WINDOWS
Windows 10 includes a host of keyboard shortcuts and mouse gestures that greatly simplify the everyday tasks of resizing, moving, minimizing, arranging, and otherwise managing windows. The most useful trick is a collection of “snap” techniques. These have been around for several Windows versions, but Windows 10 adds some extremely useful new tricks to the old familiar methods.
The simplest window-snapping scenario is a PC with a single display, where you want to arrange two windows side by side. You might want to compare two Word documents, move files between the Documents folder and an archive, or do financial research in a web browser and plug the numbers into an Excel spreadsheet.
Drag a window title bar to the left or right edge of the screen, and it snaps to fill that half of the display. As soon as you let go of the title bar, the window snaps into its position and Windows helpfully offers thumbnails for all other open windows to help you choose what to run alongside your first snapped window.
In Figure 3-12, for example, we’ve just snapped a Microsoft Edge browser window to the left side of the screen and now have a choice of three other running windows to snap opposite it. (If you don’t feel like snapping a second window, just press Esc or click anywhere except on one of those thumbnails. They vanish immediately and retain their previous size and position.)
Figure 3-12 When you snap a window to one edge of the display, Windows shows other open windows in thumbnails alongside the snapped window for easy side-by-side arrangement.
Note that the window resizes when the mouse pointer hits the edge of the screen. To use this feature with minimal mouse movement, start your drag action by pointing at the title bar near the edge you’re going to snap to.
As soon as you begin dragging a snapped window away from the edge of the screen, it returns to its previous size and position.
Here are a few ways you can snap windows in Windows 10 by using a mouse or by dragging directly on a touchscreen:
- Drag the title bar to the top of the screen to maximize the window, or drag the title bar away from the top edge to restore it to its previous window size.
- Drag a window title bar to any corner of the screen, and it snaps to fill that quadrant of the display. This capability is new in Windows 10 and is most useful on large, high-resolution desktop displays.
- Drag the top window border (not the title bar) to the top edge of the screen, or drag the bottom border to the bottom edge of the screen. With either action, when you reach the edge, the window snaps to full height without changing its width. When you drag the border away from the window edge, the opposite border snaps to its previous position.
The rules work the same with multi-monitor setups. With two side-by-side monitors, for example, you can drag the mouse to the inside edge of a display and snap a window there, allowing for two pairs of equal-size windows lined up from left to right. By dragging the title bar, you also can move a maximized window from one screen to another on a multi-monitor system.
The Windows 10 taskbar also exposes some traditional window-management menus. The secret? Hold the Shift key as you right-click a taskbar button. For a button that represents a single window, the menu includes commands to Restore, Move, Size, Minimize, Maximize, and Close the window. For a grouped taskbar button, Shift+right-click displays commands to arrange, restore, minimize, or close all windows in the group.
If you find it disconcerting to have windows snap to a certain size and position when you drag their title bars, you can disable Snap. The options controlling Snap are at Settings > System > Multitasking.
USING A KEYBOARD AND MOUSE IN WINDOWS 10
As of version 2004, the options for customizing a keyboard had not yet made the transition from Control Panel to Settings. To find these options, type keyboard in the Search box. The options are few, but they might affect your typing comfort level:
The repeat delay—the amount of time Windows waits as you hold down a key before repeating that key—is set, by default, a bit long for the tastes of some proficient typists. You can make it shorter by dragging the slider to the right. On the other hand, if you sometimes find that Windows gives you an unwanted string of repeated characters, you can drag the slider leftward. You might also then want to reduce the repeat rate.
Increasing productivity with keyboard shortcuts
Windows 10 offers so many keyboard shortcuts that learning them all would be a remarkable feat, a bit like memorizing 80 digits of pi. Becoming familiar with a handful (or several handfuls), on the other hand, can definitely improve your productivity without being a burden on your long-term memory.
A shortcut for emojis
A recent addition to the collection of keyboard shortcuts, introduced in 2017, simplifies access to the Windows 10 emoji library. Press Windows key+. (period) or Windows key+; (semicolon) in any window that accepts text input, and the emoji panel appears. Within the panel, you can use the Tab key to navigate between categories of emojis and the left and right arrow keys to move within a category. Your mouse and fingers work as well, of course.
To change from one category of emoji to another (smiley faces to people, for example), click or tap along the bottom row of the pop-up display. To change the skin tone of an emoji in the people category, click one of the colored dots above the people emojis. You may choose from six color gradations. The emoji panel remains visible until you press Esc or click the Close button.
Starting with Version 1903, the emoji panel has included tabs for kaomoji and special characters, as well as the usual graphic characters. Kaomoji are combinations of text characters that take on expressive facial characteristics. The following is an example:
(●’∪’●)
To check out the kaomoji library, press Windows key+. to display the emoji panel. Then click the second item in the row above the emojis. The emoji library is also accessible via the Touch Keyboard.
Using alternative keyboard layouts
Windows 10 offers keyboard support for more than 300 languages. Most of these languages are available as full language packs, and installing a language pack changes the entire Windows user interface—menus, dialog boxes, and all—to the selected language. But you can also simply install a keyboard layout for another language, without changing the user interface. This might prove handy if you work in an international environment and occasionally need to dash off an email to, say, a Russianspeaking colleague or customer.
To install another keyboard, go to Settings > Time & Language > Language. When you click Add A Language, the entire set of available languages appears, and you can make your choice. When the keyboard is installed, it becomes available through the Input Indicator system icon, which typically lives on the taskbar, adjacent to the clock. Clicking there pops up a menu of available keyboards, along with a Language Preferences command.
Clicking Language Preferences takes you back to Settings > Time & Language > Language.
To remove a language, make it the default, or set options relating to the language, return to Settings > Time & Language > Language, and then click on the language.
Taming your mouse or other pointing device
To teach your mouse new tricks, go to Settings > Devices > Mouse. With settings here, you can swap the functions of your left and right mouse buttons (great for lefthanded folks) and control how much to scroll each time you roll the mouse wheel. The remainder of the mouse configuration options are still in Control Panel; to get there, click Additional Mouse Options. The Mouse Properties dialog box in Control Panel looks like this:
Mouse Properties has settings that define a double-click (that is, how quickly you must twice press the mouse button for it to be detected as a double-click instead of two clicks), change pointer shapes, configure other pointer options, and more. Depending on the mouse you have, you might find additional options in Mouse Properties or in a separate app.
If your computer has a precision touchpad, the Touchpad page in Settings > Devices has a lot to offer, as shown in Figure 3-13.
You can use options here to turn off the touchpad when you have a mouse attached or disable it altogether. Those who’ve been annoyed when the pointer suddenly hops to a new location while they type (usually because a thumb lightly grazed the touchpad) will shout hosannas about the sensitivity drop-down. Setting this to Low Sensitivity should eliminate most grazing accidents. Other settings determine what various gestures (tapping, doubletapping, tapping with two or three fingers, dragging with two or three fingers, and so on) will do.
Figure 3-13 Touchpad users are richly rewarded by visiting Settings > Devices > Touchpad.
USING WINDOWS 10 ON A TOUCHSCREEN DEVICE
Tablet Mode was specifically designed for sustained use with a touchscreen-equipped device such as a tablet or hybrid PC. We already discussed the Windows user experience with a conventional PC. Tablet Mode introduces a series of significant changes—automatically if it detects you’re using a touchscreen device without a keyboard attached, or manually if you want to treat a touchscreen-equipped laptop as if it were a tablet.
Working in Tablet Mode
Windows 10 makes some assumptions about your preferences based on your hardware. On conventional PCs with a keyboard and mouse, Tablet Mode is off. On dedicated tablets, this mode is on by default. You can adjust these preferences at Settings > System > Tablet Mode. On a hybrid device with a relatively small touchscreen, you might prefer to have Tablet Mode on full time, for example.
To turn on Tablet Mode, press Windows key + A, click the icon at the right end of the taskbar, or swipe from the right edge to open Action Center, then click or tap Tablet Mode.
Turning on Tablet Mode makes the following changes in the Windows 10 user experience:
- It reconfigures the taskbar, bumping up button sizes, adding a back button, replacing the search box with a search button, and hiding all taskbar buttons. The following comparison shows the normal taskbar on top and the same area in Tablet Mode below it:

- All apps run in full screen. It’s possible to snap two apps side by side, but they have a thick sizing bar between them, similar to the one introduced in Windows 8.
- Start opens in full screen, with the app list hidden by default and accessible only by tapping the hamburger menu icon in the upperleft corner of the display.
Using the Touch Keyboard
The other essential feature of a touchscreen-equipped device, especially one without a keyboard, is the presence of the extremely versatile Windows 10 Touch Keyboard.
It allows text entry into dialog boxes, web forms, your browser’s address bar, documents, the search box— anywhere you would normally need a physical keyboard to provide input.
Figure 3-14 shows the standard Touch Keyboard.
Figure 3-14 This is the default layout of the Touch Keyboard; use the control in the upper-left corner to change the keyboard display mode, dock or float the keyboard, or jump to language or typing settings.
In tablet mode, the Touch Keyboard should appear automatically when you tap to position the insertion point in a place that accepts text entry. You can also make the Touch Keyboard appear by tapping its button, which appears in the notification area on the right of the taskbar. (If this button is hidden, right-click or do a long press on the taskbar and then select the Show Touch Keyboard Button option.) Note that by clicking the Touch Keyboard button, you can also display the Touch Keyboard on a computer that is not touch-enabled.
The limited screen space available for the Touch Keyboard means you have to switch layouts to enter symbols and numbers. Tap the &123 key in the lower-left corner to switch between the standard QWERTY layout and the first of two symbol layouts, as shown in Figure 3- 15. Note that the layout includes a dedicated number pad, which is extremely handy for working with spreadsheets and performing other data-entry tasks.
Figure 3-15 Tap the &123 key in the lower-left corner to switch between the standard QWERTY keys and this alternate view of symbols and numbers.
In some respects, the Touch Keyboard is more versatile than its physical counterparts. Entering a typographic symbol like the interrobang (a character consisting of an exclamation point superimposed on a question mark) or an emoji doesn’t require the use of ANSI codes. Instead, you can enter characters directly. To enter an interrobang, for example, click (or press) and hold either the question mark or the exclamation point. Relevant special-character options will appear in a panel above the character you clicked. Use the same technique to enter, for example, an accented vowel.
To see the vast array of available emojis and kaomojis, click the “happy face” button on the bottom row. The Touch Keyboard also offers a large array of symbols. To see what’s there, click &123, and then click Ω.
With the emoji keyboard layout visible, the bottom row displays keys you can use to switch between different categories. All the categories offer more symbols than can be displayed at one time in the Touch Keyboard. To explore a category fully, swipe left and right. If you don’t have a touch display, you can scroll by clicking the minuscule arrows in the lower-right and -left corners of the emoji layout. Figure 3-16 shows an example of the people category. Note that by clicking and holding the people category icon, you can change the skin tone of the people emojis.
Figure 3-16 Windows 10 supports hundreds of emoji characters. Pick a category from the bottom row and use the arrow keys to scroll through different character sets, 36 at a time.
Dictating text with the Touch Keyboard
By clicking the microphone button near the upper-left corner of the Touch Keyboard, you can dictate text instead of typing. In addition to words, you can dictate punctuation symbols and such editing instructions as “delete last ten words.” To enable dictation, you must open Settings > Privacy > Speech and turn on Online Speech Recognition.
Typing with shapes
If you find hunting and pecking is onerous and slow, draw your words instead. Using either the compact or the wide (default) layout of the Touch Keyboard, you can create words by drawing a line from one letter to the next. Windows does an excellent job of recognizing your intentions, and where it cannot it proposes alternative possibilities (just as it would if you misspelled using conventional typing methods). Mobile phones have had this “swipe to type” capability for some time, and if you’ve texted this way on a hand-held platform, you’ll find it much the same on your Windows tablet.
Changing keyboard styles and docking
Tapping the button in the upper-left corner of the Touch Keyboard reveals a unified settings menu for the keyboard:
The two options in the middle row of this menu control whether the keyboard floats or is docked against the lower edge of your screen. The bottom row includes buttons to display language settings, typing settings, and tips.
The buttons on the top row of the menu change the layout of the keyboard itself. With the button on the left, you get the default layout shown earlier. The button in the fourth position displays the “full” layout, which, like a typical laptop keyboard, includes Alt and Ctrl keys, a Tab key, and an Fn key. If you’re handy with thumbs, you’ll like the second button from the left, which compresses the keyboard into a one-handed miniature that takes up a minimum of screen space and functions just like your cell phone. The third layout from the left splits the keyboard into left and right sections, each of which you can operate with one-handed dexterity. With all these layouts, you can take advantage of Microsoft’s superb text-prediction engine. As soon as you finish a word (and sometimes before), likely continuations appear in a row at the top of the keyboard. So, for example, to write “Give me a few minutes to get the money,” all you need to type is the first two letters. You can click your way through the rest of the sentence. If you’re sending input to a modern (UWP) app, the engine will suggest appropriate emojis as well as text continuations.
Typing suggestions are an opt-in feature. To enable them, go to Settings > Devices > Typing. Under the Typing heading on the Typing page, turn on Show Text Suggestions As I Type On The Software Keyboard.
Meanwhile, the rightmost button in the menu’s top row replaces the keyboard with a handwriting input panel, shown in Figure 3-17. Text that you enter in the input box is automatically translated into characters for entry at the current insertion point.
Figure 3-17 The handwriting panel does a remarkable job at translating even sloppy penmanship into readable results.
Even if your handwriting is so bad that no one but you (and perhaps not even you) can read it, you might be in for a surprise. In the unlikely event that the panel misreads your intent, you can still select from a row of alternatives that appears at the top of the window.
Although the handwriting panel is most useful with devices that support pen input, if you find yourself without a stylus, you can still use it with your fingertip. To do this, visit Settings > Devices > Pen & Windows Ink and turn on Write In The Handwriting Panel With Your Fingertip.
USING THE WINDOWS INK WORKSPACE
If you’ve used the Windows Ink workspace in previous versions of Windows 10, you might be startled by its appearance in version 1909 or later. Earlier incarnations gathered three pen-enabled apps—Sticky Notes, Sketchpad, and Screen Sketch—into a pane that appeared on the right side of your screen. Sticky Notes is still with us as a separate program (it’s been available in that form for a long time), but the pop-up pane is gone, replaced by buttons for launching Whiteboard and Fullscreen Snip:
Whiteboard provides a canvas on which you and teammates can share text, drawings, graphics, and imported PDFs and Word or PowerPoint documents. Fullscreen Snip is exactly what its name implies. It takes a snapshot of the current screen, allowing you to annotate and share. Fullscreen Snip is an entrée into Snip & Sketch, which is a replacement for the Snipping Tool app that you may have used in earlier Windows versions.
Setting pen options
Options relating to your pen are located at Settings > Devices > Pen & Windows Ink. In the lower portion of that settings page, you’ll find a set of options for configuring pen shortcuts. (See Figure 3-18.) These options, which require a pen with a shortcut button, govern what happens when you press that button once, press it twice in quick succession, and press and hold.
Figure 3-18 With the single-click, double-click, and hold settings, you can train your pen to launch a program, perform a screen capture, summon Cortana, or simply open the Windows Ink workspace.
Within the three sets of drop-downs, you’ll find options to launch programs, capture screens, and more.
WORKING WITH FONTS
Introduced in Windows 10 version 1803 is a Fonts page in Settings (Settings > Personalization > Fonts). If you miss the ancestral font home in Control Panel, you can still visit, but the new Settings page, shown in Figure 3- 19, is perhaps easier on the eyes. In the new venue, fonts that include color information are displayed in color, and the page that appears when you click a font presents more information about licensing, trademark, version, manufacturer, and assorted other details. A handy drop target is now available at the top of the page; you can use it to install fonts directly from File Explorer. A link below that transports you to the Microsoft Store, where additional fonts are available.
Figure 3-19 Font management has migrated to Settings, but the Fonts page in Control Panel remains.
The primary font format used by Windows is TrueType. Windows also supports OpenType and PostScript Type 1 fonts. To install a new font, you can drag its file from a folder or compressed .zip archive to Fonts in Settings. But you don’t need to open Fonts; the simplest way to install a font is to right-click its file in File Explorer and choose Install. Because font file names are often somewhat cryptic, you might want to double-click the file, which opens the font preview window, to see what you’re getting. If it’s a font you want, click the Install button.
Making text easier to read
If you like to work at high screen resolutions but find yourself straining to read the text, you can try the following:
- Look for scaling (“zoom”) commands in the text-centric programs you use. Many programs, including most modern word processors, include these scaling features. Scaling text up to a readable size is a good solution for particular programs, but it doesn’t change the size of icon text, system menus (such as Start), or system dialog boxes.
- To enlarge part of the screen, use the Magnifier tool.
- Use the scaling options in Display settings. Adjusting the scaling to a higher level enables you to have readable text at higher screen resolutions.
As of version 1809, you can change the size of text everywhere, without changing the overall scaling of your system. Go to Settings > Ease Of Access > Display. Then use the slider under the heading Make Text Bigger. A sample text window will show you how large your text becomes as you drag the slider (see Figure 3-20). You can choose any size from 100 to 225 percent.
Figure 3-20 By moving this slider, you can magnify the size of text throughout Windows.
Using font smoothing to make text easier on the eyes
ClearType is a font-smoothing technology that reduces jagged edges of characters, thus easing eye strain.
To check or change your font-smoothing settings, type cleartype in the search box and then click Adjust ClearType Text. Doing so opens the ClearType Text Tuner, which, in its first screen, has a check box that turns ClearType on when it’s selected. The ensuing screens that appear each time you click Next offer optometrist-style choices (“Which Is Better, Number 1 or Number 2?”) to help you reach ClearType perfection. If you have more than one monitor attached, the ClearType Text Tuner goes through this exercise for each one.
Windows includes seven fonts that are optimized for ClearType. The names of six of these—Constantia, Cambria, Corbel, Calibri, Candara, and Consolas—begin with the letter c—just to help cement the connection with ClearType. If you’re particularly prone to eye fatigue, you might want to consider favoring these fonts in documents you create. (Constantia and Cambria are serif fonts, considered particularly suitable for longer documents and reports. The other four are sans serif fonts, good for headlines and advertising.) The seventh ClearType-optimized font, Segoe UI, is the typeface used for text elements throughout the Windows user interface. (Windows also includes a ClearType-optimized font called Meiryo that’s designed to improve the readability of horizontally arrayed Asian languages.)