


How to Create a Date Table in Power Bi?

Creating a date table in Power Bi can be intimidating for novice data analysts, but it doesn’t have to be! With the right guidance and a few simple steps, you can create a comprehensive date table that will take your data analysis to the next level. In this article, we’ll provide a step-by-step guide on how to create a date table in Power Bi and some useful tips to help you get the most out of your date table. So, if you’re ready to get started, let’s dive in and explore how you can create a date table in Power Bi.
Steps to Create a Date Table in Power BI:
- Step 1: Launch the Power BI Desktop app and select the “Get Data” option.
- Step 2: Select “Other” from the Get Data window and click on “Blank Query”.
- Step 3: Select the “Advanced Editor” option from the “Home” tab.
- Step 4: Paste the following code into the Advanced Editor window and select the “Done” option.
- Step 5: Select the “List” option and click “OK”.
- Step 6: Select the “To Table” option from the “Transform” tab.
- Step 7: Select the “Date” column from the list and click “OK”.
- Step 8: Select the “Close & Apply” option from the “Home” tab.
Create Date Table in Power BI
Power BI is a powerful data analysis tool that allows users to quickly create data visualizations and explore data relationships. One of the most important components of a successful Power BI project is to create a date table. A date table is a table that contains all the dates in a given range. It can be used to easily compare data across different periods and to add a timeline to a visualization. In this article, we will discuss how to create a date table in Power BI.
The first step in creating a date table is to select a range of dates. This range can be set to the current year, the previous year, or any other number of years. Once the range is selected, the next step is to create the columns and rows for the date table. This can be done by selecting the “Create Table” option in the Power BI ribbon. Then, the user can enter the date range and the columns and rows for the date table will be automatically created.
The next step is to add the necessary fields to the date table. The most common fields are the date, month, and year. The user can also add other fields such as the day of the week, quarter, and month name. Once the fields have been added, the user can format the date table. This can be done by selecting the “Format Table” option in the ribbon. The user can then customize the formatting of the date table, including the font size and color.
Set Date Table Slicers
The next step is to set up the date table slicers. Slicers are used to filter data based on a particular field. In this case, the user can set up slicers for the date, month, and year fields. This will allow the user to quickly filter the data based on a particular date or period of time.
The final step is to add the date table to the report. This can be done by selecting the “Add to Report” option in the ribbon. This will add the date table to the report, allowing the user to quickly explore the data and create visualizations.
Create Calculated Columns
In addition to the date table, the user can also create calculated columns. Calculated columns are used to calculate values based on other columns in the data table. For example, the user can create a calculated column to calculate the total number of days in a given month. This can be used to quickly compare the number of days in different months or to calculate the average number of days in a given period.
Create Relationships
The final step is to create relationships between the date table and other tables in the report. This can be done by selecting the “Relationships” option in the ribbon. The user can then select the appropriate fields in both tables and create the relationship. This will allow the user to quickly explore the data and create visualizations.
Conclusion
Creating a date table in Power BI is a relatively simple process. The user can quickly create a date table by selecting the “Create Table” option in the ribbon. They can then add the necessary fields to the date table and format it. The user can also set up the date table slicers and create calculated columns. Finally, the user can create relationships between the date table and other tables in the report.
Frequently Asked Questions
Question 1: What is a Date Table in Power Bi?
Answer: A Date Table in Power Bi is a special table that contains a list of dates. This table can be used to add extra date and time information to the data model in Power Bi. The Date Table is helpful for creating various types of calculations and visualizations in Power Bi that are based on dates. It can also be used to filter and group data within Power Bi.
Question 2: How do I create a Date Table in Power Bi?
Answer: To create a Date Table in Power Bi, you first need to create a new table in the data model. This table should contain a list of dates in a column, starting with a start date and ending with an end date. You then need to set up a relationship between this Date Table and the other tables in the data model. This relationship will allow you to filter and group data based on the dates in the Date Table.
Question 3: What type of data should be included in the Date Table?
Answer: The Date Table should include a list of dates in a column, starting with a start date and ending with an end date. You may also want to include other related information such as day of week, month name, quarter, or year. This will allow you to create various types of calculations and visualizations in Power Bi that are based on these additional date and time related fields.
Question 4: How should the Date Table be related to other tables in the data model?
Answer: The Date Table should be related to the other tables in the data model by a one-to-many relationship. This relationship will allow you to filter and group data based on the dates in the Date Table. The Date Table should always be the one side of the relationship, with the other tables being the many side.
Question 5: How can I use a Date Table in Power Bi?
Answer: The Date Table can be used in Power Bi for various types of calculations and visualizations. It can be used to filter and group data within the data model, and to create time-based calculations such as year-over-year or rolling averages. It can also be used to create sophisticated visualizations such as timelines and calendar charts.
Question 6: What are some best practices for creating a Date Table in Power Bi?
Answer: When creating a Date Table in Power Bi, it is important to make sure that the table is set up with the correct start and end dates, and that it includes other related information such as day of week, month name, quarter, or year. Additionally, it is important to ensure that the Date Table is related to the other tables in the data model by a one-to-many relationship, with the Date Table being the one side. Finally, it is important to test the Date Table to ensure that the calculations and visualizations are working as expected.
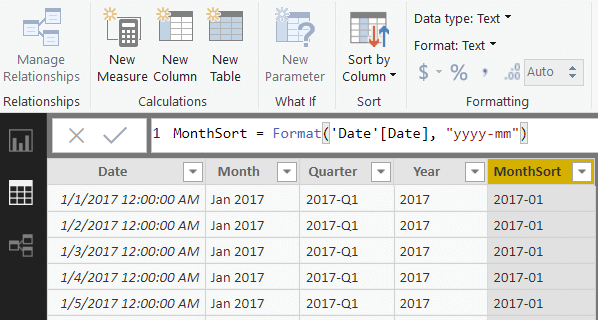
Creating a simple date table in Power BI
Creating a date table in Power BI is a great way to unlock the full power of your data and make it easier to navigate and analyze. With the help of the DAX language, you can create powerful relationships between your data and the date table. With the ability to generate dynamic calendar and time intelligence calculations, you can quickly create insightful visuals for any business need. So, if you’re looking for a powerful tool to make data analysis easier, a date table in Power BI is the perfect solution for you.